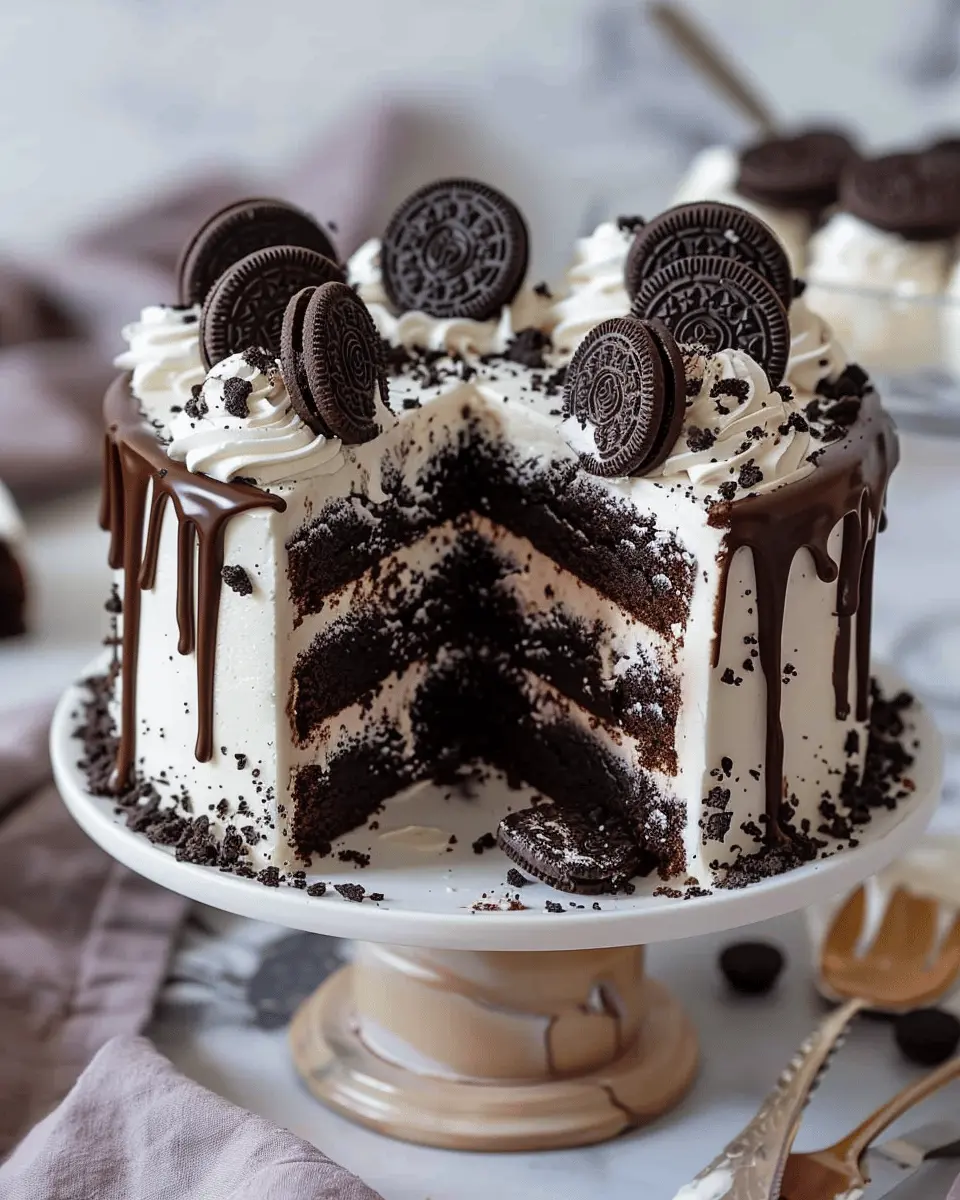
Introduction to Oreo Cake Recipe
The allure of Oreo desserts
There’s something undeniably magical about Oreo desserts. Whether it’s the creamy filling or the cookie’s satisfying crunch, Oreos have captured the hearts (and taste buds) of many. Various creations—like Oreo cheesecake, Oreo milkshakes, and, of course, the star of the show—Oreo cake—are delightful tributes to this beloved cookie. These treats often invoke memories of simpler times, reminding us of childhood snacks shared with friends or cozy family gatherings. No wonder they remain a popular choice for celebrations and casual indulgence alike!
Why make an Oreo cake at home?
Making an Oreo cake at home offers numerous advantages. First, the satisfaction of baking from scratch is hard to beat. You get to control the ingredients, ensuring they’re exactly to your liking—whether that means adding extra Oreo crumbles or adjusting the sweetness level. Plus, homemade desserts bring a personal touch; they’re not just food, but expressions of love and care.
Additionally, baking can be a therapeutic activity. Studies suggest that engaging in tasks that involve repetitive motions, like mixing batter or icing a cake, can help reduce stress. So, why not combine relaxation with the delicious reward of a homemade dessert? You’ll be surprised by how simple it can be to whip up a show-stopping Oreo cake that impresses your friends or family at your next gathering.
A personal touch to the joy of baking
I vividly remember the first time I baked an Oreo cake for a friend’s birthday. The kitchen was filled with the rich smell of chocolate and cream, and the anticipation was tangible. As I layered the cake and sprinkled crushed Oreos on top, I felt a sense of joy that only baking can bring. It wasn’t just about the cake’s taste; it was about creating something special for someone I cared about. Sharing that cake and seeing my friend’s delight made the effort worth every moment.
So, if you’re pondering whether to embark on this baking adventure, let me assure you—embracing the Oreo cake recipe is a journey filled with delicious rewards and cherished memories. Are you ready to create your own sweet masterpiece? Let’s dive into the recipe!
Ingredients for Oreo Cake
Overview of Key Ingredients
When embarking on your delicious Oreo Cake Recipe, having the right ingredients makes all the difference. Here’s what you’ll need:
- Oreo Cookies: The star of your cake, providing that signature chocolatey crunch and creaminess.
- All-Purpose Flour: It gives structure to your cake, ensuring it rises beautifully.
- Granulated Sugar: For sweetness, enhancing the flavor of your cake and frosting alike.
- Baking Powder: This helps the cake to rise, giving it a light and fluffy texture.
- Eggs: Essential for binding the ingredients together while adding moisture.
- Milk: Adds richness and enhances the cake’s moistness.
- Butter: For a rich flavor, it really elevates your cake’s taste profiles.
Importance of Using Quality Ingredients
Choosing high-quality ingredients is crucial for a memorable Oreo Cake Recipe. Think of it as the foundation of your masterpiece. Fresh eggs and real butter can elevate your cake from good to absolutely phenomenal. Plus, using the best Oreos not only boosts flavor but also that fantastic crunch we love.
For more insights on ingredient quality, check out The Kitchn’s guide on baking essentials. Remember, the joy of baking is in the details—so don’t skimp when it comes to what you’re using!
Preparing the Oreo Cake
Baking an Oreo Cake is not just about mixing ingredients; it’s a fun process that allows you to unleash your inner pastry chef. Follow these detailed steps, and you’ll create a delicious cake that is sure to impress your friends and family. Let’s dive in!
Preheat and prepare your pans
Before you start mixing, it’s essential to set the stage for your Oreo Cake Recipe. Preheat your oven to 350°F (175°C). While your oven heats up, grab your cake pans—ideally two 9-inch round pans for this recipe. Make sure to grease and flour them thoroughly. This step is crucial, as it prevents your cake from sticking during baking. If you want a foolproof method, consider using parchment paper at the bottom of each pan for extra insurance.
Combine dry ingredients properly
Next, let’s gather our dry ingredients. In a medium bowl, sift together the flour, baking powder, baking soda, and a pinch of salt. Sifting not only helps eliminate lumps but also aerates your flour, leading to a fluffier cake. If you’re curious about the science behind this, check out resources from the American Chemical Society that explain how proper mixing influences baking outcomes.
Once your dry ingredients are combined, set them aside. It’s best not to rush this step; a good foundation can make or break your Oreo Cake.
Cream the butter to perfection
Now comes the fun part—creaming the butter and sugar. In a large mixing bowl, beat 1 cup of softened butter with 1.5 cups of granulated sugar until the mixture is pale and fluffy—about 4-5 minutes. Use a hand mixer or stand mixer for best results. This process introduces air into the batter, giving your cake that delightful lightness. It’s a good idea to scrape down the sides of your bowl occasionally to ensure an even mix.
Feeling adventurous? You can also add a teaspoon of vanilla extract at this stage for a flavor boost!
Mix in the wet ingredients
With the butter and sugar creamed to perfection, it’s time to mix in the wet ingredients. Add 3 large eggs, one at a time, ensuring each one is fully incorporated before adding the next. Then, pour in 1 cup of buttermilk. Buttermilk not only adds moisture but also a lovely tang that complements the sweetness of the Oreos.
Mix these ingredients on low speed until just combined—overmixing can lead to a denser cake, which we want to avoid.
Fold in those fabulous Oreos
Now for the pièce de résistance: the Oreos! Take about 10-12 cookies and crush them into chunky pieces—resist the urge to make a powder! You want those lively chunks to provide texture in your cake. Gently fold these into your batter with a spatula. The sight of those recognizable cookie pieces against your creamy mixture is enough to make anyone smile.
Bake and cool the layers
Pour the cake batter evenly into your prepared pans. Pop them into your preheated oven and bake for 25-30 minutes. You can tell they are done when a toothpick inserted into the center comes out clean or with a few moist crumbs. Once they are perfect, allow them to cool in the pans for about 10 minutes before transferring them to a wire rack. This cooling step is vital as it helps prevent soggy bottoms.
As you wait, this could be a great time to prepare your icing or consider how you want to decorate your cake. The Oreo Cake Recipe is versatile, so feel free to explore!
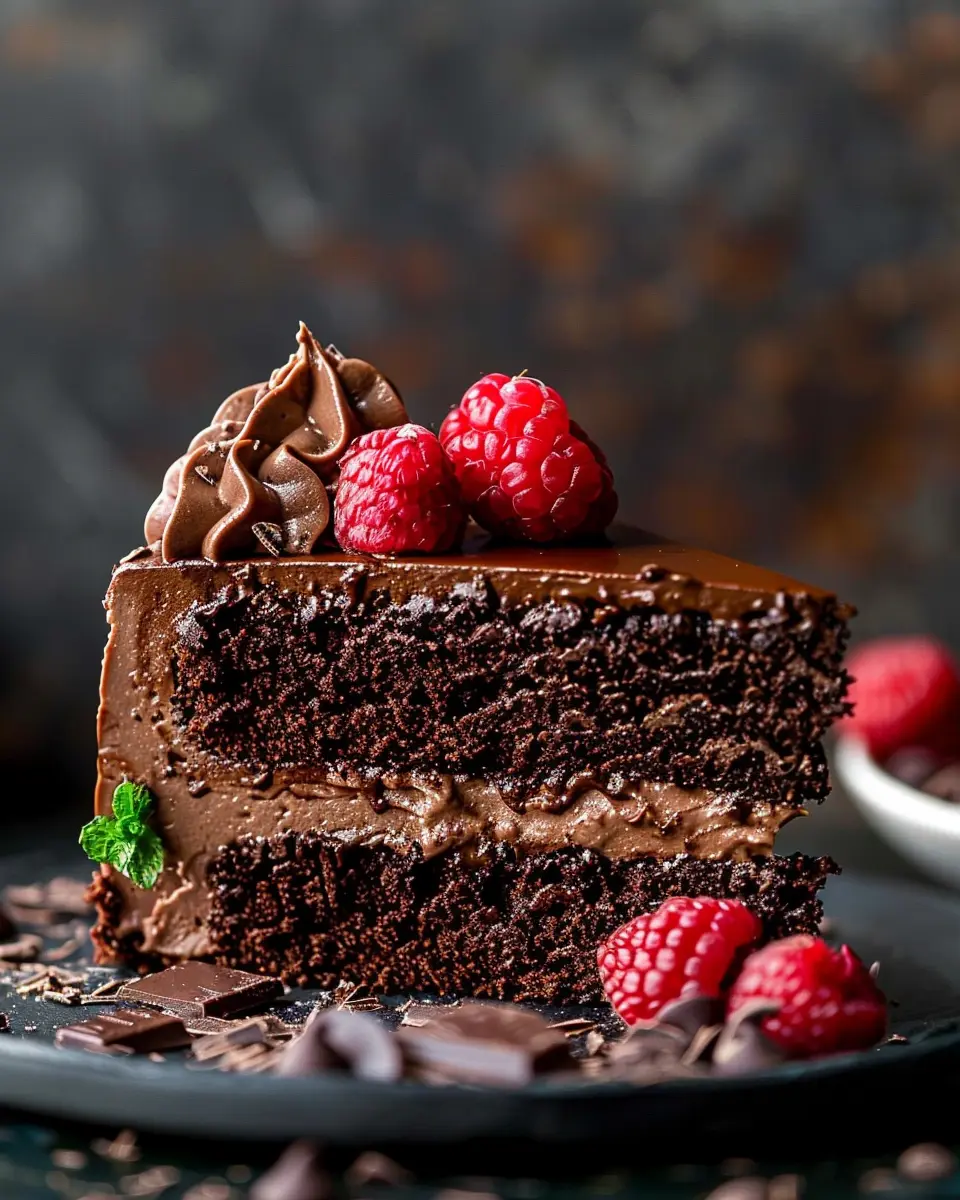
In conclusion, the process of preparing your Oreo Cake is as rewarding as the final product. From gathering your ingredients to the satisfying aroma that fills your kitchen, every step makes this cake special. Enjoy the baking moment, and savor every bite!
Variations on Oreo Cake
Whether you’re an Oreo enthusiast or just looking to impress at your next gathering, there are plenty of delicious variations on the classic Oreo cake. Here are some ideas to get you inspired:
Oreo cookie and cream version
For those who can’t get enough of the traditional flavor, why not double down? Use crushed Oreo cookies as both a base and a topping. Incorporate them into the cake batter for added texture and flavor, and whip up a cream cheese frosting mixed with crushed Oreos to create a luscious topping. You could even decorate with whole Oreos on top for that Instagram-worthy finish—your friends won’t be able to resist!
Gluten-free Oreo cake option
You can still enjoy a slice even if you’re gluten-sensitive. Simply swap your all-purpose flour for a gluten-free blend. Be sure to check that your Oreo cookies are certified gluten-free—many brands now offer those options. Pair this with a rich vanilla buttercream to keep things decadent without compromising on flavor. With so many gluten-free alternatives available, your dessert table will cater to everyone!
Customizable flavors and add-ins
The beauty of the Oreo Cake Recipe is its versatility. Consider adding flavors like peppermint or orange zest to the batter for a refreshing twist. You could also fold in chocolate chips or even pieces of Turkey Bacon for that unexpected savory contrast. Personalize your cake with various fillings and toppings to align with your unique taste.
Feeling adventurous? Try pairing slices of your Oreo cake with a scoop of dairy-free ice cream or salted caramel sauce for a flavor explosion. The possibilities are endless, so let your creativity shine! For more ideas, visit sources like America’s Test Kitchen or Serious Eats for inspiration on flavor pairings and baking techniques.
Your Oreo cake journey starts now—get baking!
Baking Tips and Notes for Oreo Cake
Tips for Even Baking with Cake Strips
To achieve that perfectly baked, moist Oreo Cake, consider using cake strips. These handy tools help insulate your cake pans, preventing the edges from cooking faster than the center. Simply soak the strips in water, wring them out, and wrap them around your pans before baking. You’ll be amazed at how much this simple step reduces doming and cracked tops, ensuring a lovely, flat cake. Want to dive deeper into the science? Check out this article on the importance of moisture in baking.
Importance of Ingredient Temperature
Another crucial factor in the success of your Oreo Cake Recipe is using ingredients at room temperature. Cold eggs and butter can lead to a dense cake because they don’t incorporate well into the batter. To get the best texture, take your eggs and butter out of the refrigerator about 30 minutes before you start baking. This little tip can elevate your cake’s fluffiness and overall taste!
These tips can set your baking journey on the right path, leaving you with a delicious Oreo Cake ready to impress your friends and family. Happy baking!
Serving Suggestions for Oreo Cake
Pairing Ideas for Beverages
When it comes to enjoying your Oreo Cake, the right beverage can elevate your dessert experience. Consider these delicious pairings:
-
Milk: The classic pairing! A cold glass of milk complements the rich chocolatey flavor and creamy fillings beautifully. For a fun twist, try flavored milk, like chocolate or vanilla.
-
Coffee: The slight bitterness of coffee balances out the sweetness of the cake. Opt for a rich espresso or a velvety latte to create that perfect contrast.
-
Tea: A light herbal or chai tea can offer a delightful palate cleanse while keeping your taste buds engaged.
Exploring these beverage options can turn your Oreo Cake experience into a mini dessert party. If you’re curious, check out this guide on Beverage Pairings for Cakes for more inspiration.
Creative Plating Tips
Presentation matters! Here are some creative ways to plate your Oreo Cake to wow your guests:
-
Layered Slices: Serve individual slices on dessert plates, layering them with a dollop of whipped cream or a scoop of vanilla ice cream.
-
Garnish: Add crushed Oreos or chocolate shavings on top of the cake for an eye-catching finish. Fresh berries can add a pop of color too!
-
Themed Decor: If you’re celebrating a special occasion, consider adding themed sprinkles or edible flowers that match your event color scheme.
Experiment with these ideas to tailor the presentation to your taste and make enjoying your Oreo Cake Recipe a memorable event!
Tips for Making the Perfect Oreo Cake
Avoiding Common Baking Mistakes
When diving into your Oreo Cake recipe, it’s crucial to avoid common pitfalls. First, make sure your ingredients are at room temperature; this means softer butter and eggs will blend more easily, leading to a fluffier cake. Also, don’t overmix your batter once you add the dry ingredients; gently fold until combined to keep that lovely light texture. Invest in a good oven thermometer to ensure your baking temperature is spot on—an unreliable oven can lead to dry or uneven cakes.
If you’re looking for more baking insights, check out resources like King Arthur Baking, which offer fantastic tips on baking fundamentals.
Ensuring the Perfect Buttercream Consistency
Getting your buttercream just right is key to an amazing Oreo Cake. Start by beating your butter until it’s light and fluffy—about 3-4 minutes should do. Gradually add in your powdered sugar, followed by a splash of heavy cream to achieve that perfect consistency. If your buttercream is too thick, add cream a little at a time; if it’s too thin, simply add more powdered sugar.
An ideal buttercream should spread smoothly and hold its shape well, so always trust your instincts and adjust as needed. Remember, grandeur is in the details—make sure to incorporate crushed Oreos into the frosting for that extra zing!
For further tips on buttercream perfection, explore Wilton’s Cake Decorating Basics. Happy baking!
Time Details for Oreo Cake
When you’re gearing up to whip up this delectable Oreo Cake Recipe, knowing the timings can make your baking experience smooth and enjoyable.
Preparation Time
Getting everything ready for your cake will take about 20 minutes. This includes gathering your ingredients, crushing the Oreo cookies, and mixing the batter. It’s a great time to crank up your favorite tunes!
Baking Time
Once your cake batter is ready, bake it for approximately 30-35 minutes. It’s crucial to monitor it closely. A good tip is to use a toothpick—when it comes out clean, your cake is done!
Total Time
In total, you’re looking at around 1 hour from start to finish. That’s not too shabby for such a deliciously creamy cake! So, pour yourself a cup of coffee and enjoy the process. Baking should be fun! If you want some baking tips, check out this informative article on the Food Network.
Nutritional Information for Oreo Cake
Calories per slice
When indulging in a slice of Oreo Cake, you might be curious about how it fits into your daily nutrition. Each slice typically contains around 300 calories, making it a delightful treat without completely derailing your diet. Sharing it with friends at gatherings can make it even more enjoyable (and a little easier on your waistline)!
Nutritional breakdown
Here’s a simple breakdown of what you’re getting with your slice of this yummy dessert:
- Fat: Approximately 15g
- Carbohydrates: About 38g
- Protein: Roughly 3g
- Sugar: Around 20g
This cake is a fun indulgence, but it’s important to balance it with healthier options throughout the day. For more in-depth nutritional guides, check out resources like the USDA FoodData Central.
Planning a party with your friends? Pair this Oreo Cake Recipe with some lighter snacks to balance things out! Everyone deserves a treat sometimes, right?
FAQs about Oreo Cake
How can I achieve the ideal cake texture?
Achieving the perfect texture for your Oreo cake is all about balance. Start by ensuring your ingredients, especially the butter and eggs, are at room temperature. This allows for better incorporation and a moist crumb. When mixing your batter, avoid overmixing — it can lead to a dense texture. It’s best to mix until just combined and then fold in crushed Oreos gently. This technique preserves the lovely lightness of your cake while delivering that signature cookie crunch in every bite!
What’s the best way to store leftover Oreo cake?
Storing leftover Oreo cake is straightforward! If you have any slices remaining, cover the cake tightly with plastic wrap or aluminum foil to prevent it from drying out. You can also place it in an airtight container for added protection. Ideally, store it in the refrigerator, where it will stay fresh for up to 5 days. If you want to keep it longer, consider freezing individual slices. Wrap them in plastic and then place them in a freezer-safe container; they can last for about 3 months. When you’re ready to enjoy, simply thaw in the fridge overnight!
Can I substitute ingredients for dietary restrictions?
Absolutely! If you’re looking to modify the Oreo cake recipe for dietary needs, consider these swaps:
- For a gluten-free option, use a 1:1 gluten-free flour blend.
- To make it dairy-free, substitute regular milk with almond or oat milk and use a dairy-free butter alternative.
- If you’re egg-free, a combination of flaxseed meal and water can replicate eggs in most cake recipes.
Always remember to check the labels of your Oreo cookies if you need them to be gluten-free or dairy-free! For more detailed information on ingredient substitutions, websites like Healthline provide insightful tips.
By following these guidelines, you can create a delicious Oreo cake that fits anyone’s dietary needs!
Conclusion on Oreo Cake Recipe
Encouragement to Try It Out
If you’ve been on the fence about trying this Oreo Cake Recipe, I can assure you, it’s worth diving into the world of chocolate and cream! The combination of rich chocolate cake and creamy Oreo frosting is sure to impress, whether it’s for a special occasion or just a cozy night in. Don’t hesitate to experiment—feel free to add your twist!
Final Thoughts on Homemade Desserts
Homemade desserts can transform even the simplest moments into something truly memorable. There’s nothing quite like the satisfaction of creating a dish from scratch, especially one as delightful as this Oreo cake. Research suggests that baking can even relieve stress—so why not reward yourself? Remember, dessert made at home not only tastes better but also brings a personal touch that store-bought treats simply can’t match. So roll up those sleeves, and enjoy the delightful journey of baking! For more dessert ideas, check out resources like the American Baking Guild.
Oreo Cake Recipe: Indulgent Delight for Your Sweet Tooth
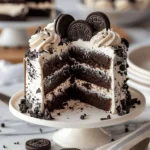
Indulge in the rich and creamy layers of this decadent Oreo cake, perfect for satisfying your sweet cravings!
- Prep Time: 20 minutes
- Cook Time: 35 minutes
- Total Time: 55 minutes
- Yield: 12 servings 1x
- Category: Desserts
- Method: Baking
- Cuisine: American
- Diet: Vegetarian
Ingredients
- 2 cups all-purpose flour
- 2 cups granulated sugar
- 1 cup unsweetened cocoa powder
- 1 tablespoon baking powder
- 1 teaspoon baking soda
- 1 teaspoon salt
- 4 large eggs
- 1 cup whole milk
- 1/2 cup vegetable oil
- 2 teaspoons vanilla extract
- 1 cup boiling water
- 1 package Oreo cookies, crushed
Instructions
- Preheat your oven to 350°F (175°C). Grease and flour two 9-inch round cake pans.
- In a large bowl, combine flour, sugar, cocoa powder, baking powder, baking soda, and salt.
- Add eggs, milk, oil, and vanilla. Mix on medium speed for 2 minutes until well combined.
- Stir in boiling water, then fold in crushed Oreo cookies.
- Pour the batter evenly into prepared pans.
- Bake for 30-35 minutes or until a toothpick inserted in the center comes out clean.
- Cool in pans for 10 minutes, then remove to racks to cool completely.
Notes
- For an extra Oreo flavor, add crushed cookies to the frosting.
- Store leftover cake in an airtight container.
Nutrition
- Serving Size: 1 slice
- Calories: 400
- Sugar: 30g
- Sodium: 200mg
- Fat: 20g
- Saturated Fat: 10g
- Unsaturated Fat: 8g
- Trans Fat: 0g
- Carbohydrates: 50g
- Fiber: 2g
- Protein: 5g
- Cholesterol: 70mg
Keywords: Oreo Cake, Dessert, Chocolate Cake