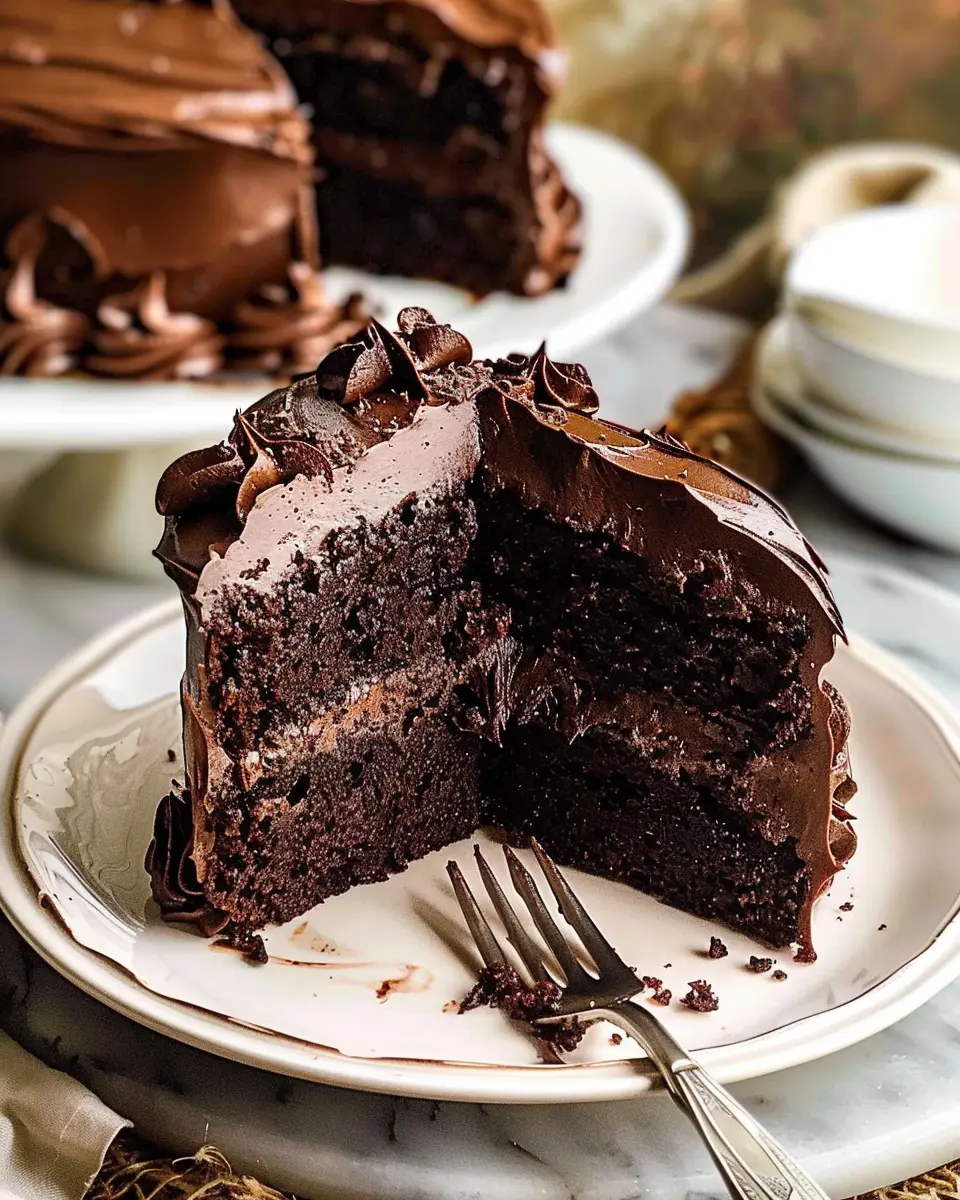
Introduction to Chocolate Thumbprint Cookies
Are you stuck in a whirlwind of deadlines and back-to-back meetings? Are you always on the lookout for a sweet treat that requires minimal time in the kitchen yet still delivers on flavor? Look no further than Chocolate Thumbprint Cookies! These delightful bites are not only delicious but also incredibly easy to whip up, making them a fantastic option for time-strapped young professionals.
Why Chocolate Thumbprint Cookies are a must-try for young professionals
Let’s face it: life can be hectic, and we’re all searching for small moments of joy amid the chaos. These Chocolate Thumbprint Cookies fit the bill perfectly. With their rich chocolate base and decadent filling, they offer a comforting escape from your busy day. Imagine grabbing a cookie as you power through your evening emails or enjoying one as a reward after a long week at work.
Creating these cookies doesn’t require advanced baking skills, making them ideal for the novice baker who wants something impressive yet manageable. The thumbprint feature adds a personal touch, allowing you to express your creativity. You can fill the cookies with a variety of toppings—think luscious ganache, creamy peanut butter, or even homemade fruit preserves. According to experts at The Spruce Eats, thumbprint cookies have been a beloved treat for generations, and for good reason: they’re versatile, adaptable, and utterly delectable.
Quick to prepare and even quicker to disappear, Chocolate Thumbprint Cookies are perfect for potlucks, office parties, or simply to enjoy on a cozy night in. Plus, they can be made ahead of time and stored in an airtight container, making them a convenient snack option throughout your busy week.
So, whether you’re looking to impress guests at your next gathering or just treat yourself to something sweet, consider making Chocolate Thumbprint Cookies. You’ll love how effortlessly they come together, leaving you more time to focus on the things that matter, like your career or personal growth. Who knew baking could be so satisfying and simple? Step into the kitchen, and let’s get baking!

Ingredients for Chocolate Thumbprint Cookies
Creating the perfect Chocolate Thumbprint Cookies begins with gathering some pantry essentials. Here’s what you’ll need for the cookies:
What You’ll Need for the Cookies
- 1 cup unsalted butter (softened at room temperature)
- 3/4 cup granulated sugar
- 1 teaspoon vanilla extract
- 2 cups all-purpose flour
- 1/2 cup unsweetened cocoa powder
- 1/2 teaspoon salt
- 1/4 teaspoon baking powder
- 1/4 cup powdered sugar (for rolling)
These ingredients will yield a delightful, rich cookie base that melts in your mouth. Have you ever considered the difference high-quality cocoa can make? It’s a game changer!
Ingredients for the Chocolate Ganache
- 1 cup semi-sweet chocolate chips
- 1/2 cup heavy cream
- 1 teaspoon vanilla extract
This velvety ganache adds the finishing touch to your Chocolate Thumbprint Cookies. It’s quick to prepare and elevates each bite into a deliciously decadent experience.
Feeling inspired? Let’s get baking and create something wonderful! If you’re curious to learn more about chocolate alternatives, check out this guide on choosing quality chocolate.
Preparing Chocolate Thumbprint Cookies
Creating Chocolate Thumbprint Cookies is a delightful experience that combines rich chocolate flavor with a lovely smooth texture. Follow these simple steps, and you’ll have a batch of tempting cookies that are perfect for any occasion or just for indulging yourself!
Gather your ingredients
Before getting into the fun of mixing and baking, it’s essential to gather your ingredients. Here’s what you’ll need for these scrumptious cookies:
- 1 cup all-purpose flour
- 1/2 cup cocoa powder
- 1/4 teaspoon salt
- 1/2 cup unsalted butter, softened
- 1/2 cup granulated sugar
- 1/4 cup brown sugar
- 2 large egg yolks
- 1 teaspoon vanilla extract
- 1 cup chocolate chips (for the ganache)
Once you’ve got everything ready, it’s time to dive into the mixing!
Mix the dry ingredients
In a medium bowl, whisk together the flour, cocoa powder, and salt. This step is crucial because it helps distribute the dry ingredients evenly, ensuring that your cookies will have a consistent texture throughout. Plus, it’s a great way to get those baking muscles flexing!
For more tips on measuring your ingredients efficiently, check out this baking essentials guide.
Cream the butter and sugars
In a large mixing bowl, combine the softened butter, granulated sugar, and brown sugar. Using an electric mixer, cream these ingredients together until they’re light and fluffy—this should take about 3-5 minutes. It’s during this step that air gets incorporated into the mixture, making your cookies soft and tender.
Incorporate the egg yolks and vanilla
Next, beat in the egg yolks and vanilla extract. Mix well until everything is fully combined; this is where the flavor truly starts to develop. The addition of egg yolks helps bind the cookies together while adding richness.
Combine all ingredients for the dough
Gradually add the dry ingredient mixture to the butter mixture. Stir until everything is just combined—overmixing can lead to tough cookies, and nobody wants that! The dough should be soft, rich, and a tad sticky.
Shape the cookies and create thumbprints
Once your dough is ready, it’s time for some hands-on fun. Using a small cookie scoop or spoon, portion out the dough and roll it into balls (about one inch in diameter). Place these balls on a parchment-lined baking sheet, ensuring they have enough space between them. Now for the fun part! Use your thumb (or the back of a spoon) to press a small indent in the center of each cookie.
Chill the dough
This is a step many home bakers overlook, but chilling your dough for at least 30 minutes makes a world of difference. It enhances the flavor and helps the cookies maintain their shape while baking. Just pop the baking sheet in the fridge and use this time to catch up on your favorite show or read a few chapters of a good book.
Bake the cookies
Preheat your oven to 350°F (175°C). When you’re ready, bake your cookies for 10-12 minutes or until they’re firm to the touch. Let them cool on the baking sheet for a couple of minutes before transferring them to a wire rack.
Prepare the chocolate ganache
While your cookies cool, it’s time to prepare the chocolate ganache. Place your chocolate chips in a heatproof bowl. In a small saucepan, heat heavy cream until it just starts to simmer. Pour the hot cream over the chocolate chips and let it sit for a minute before stirring until smooth. This rich ganache will be the star of your cookies!
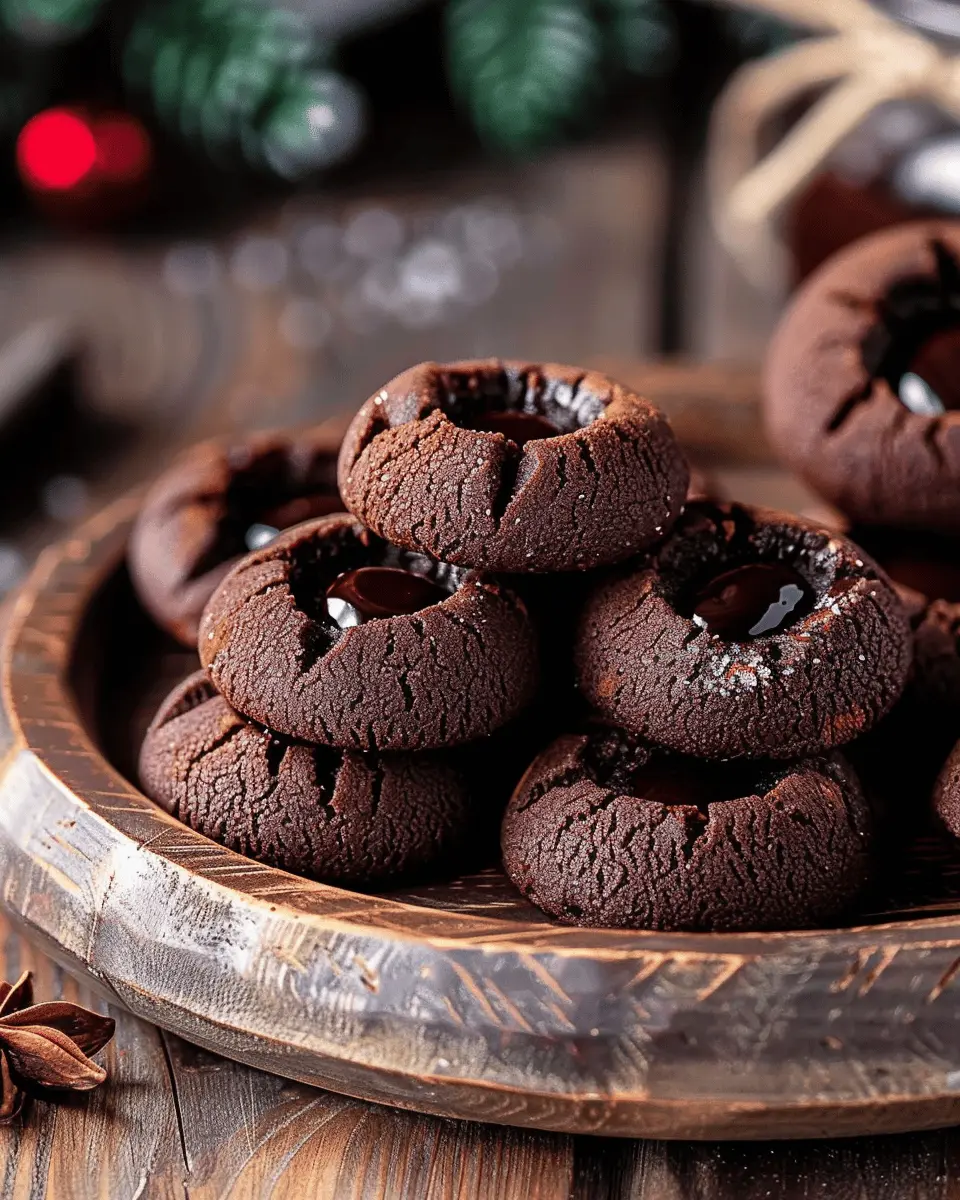
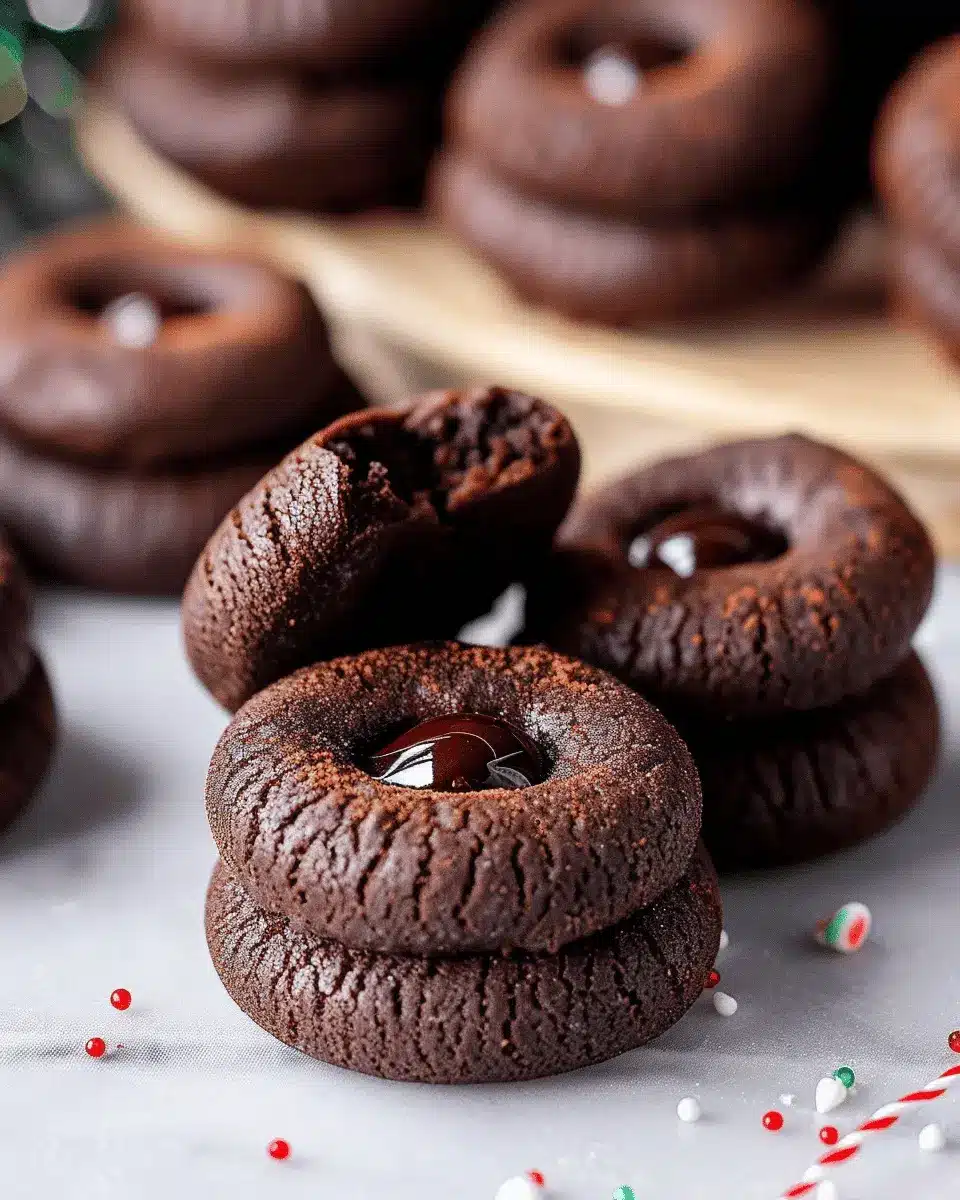
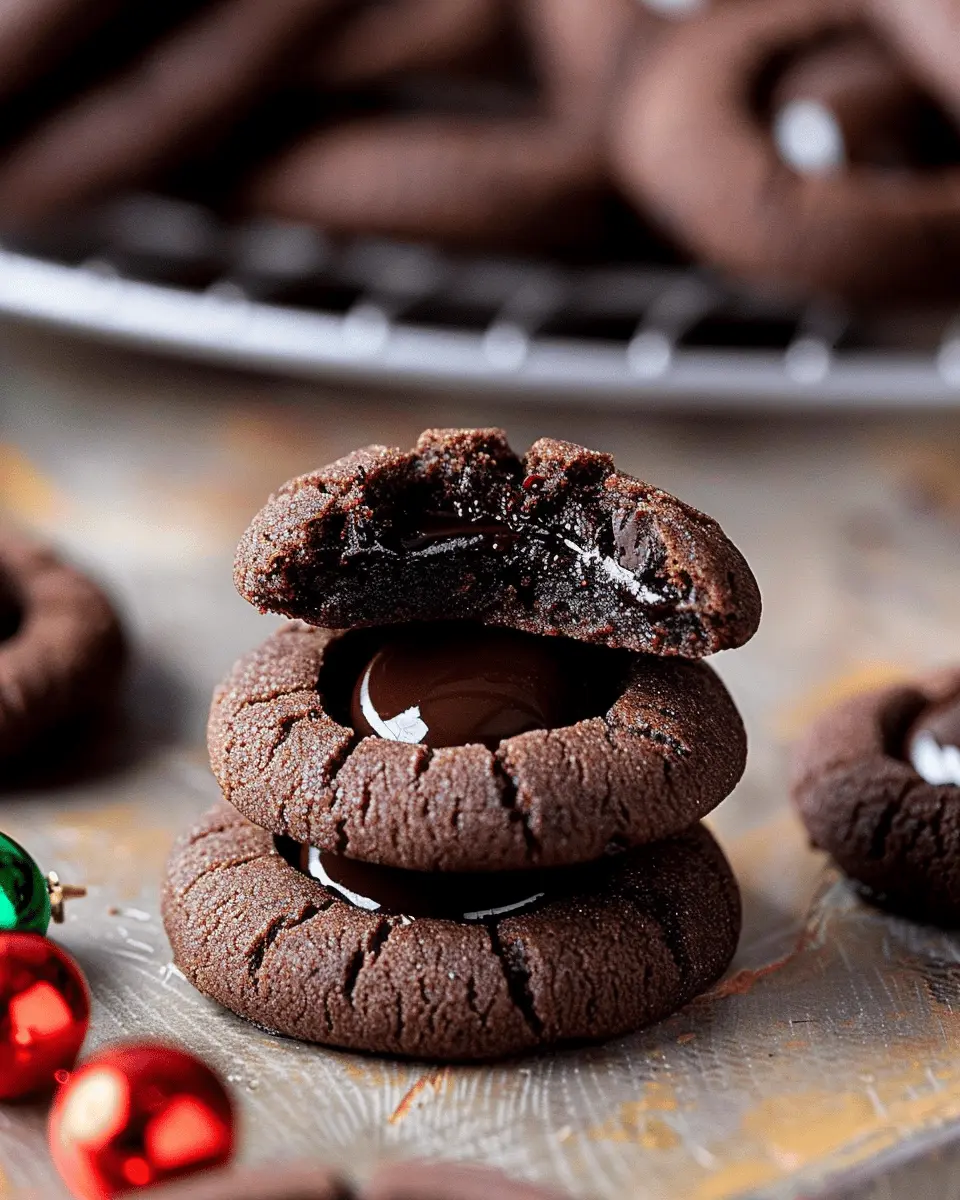
Assemble the cookies with ganache
Once your cookies have cooled completely, spoon or pipe the chocolate ganache into each thumbprint. You can have fun with this— different swirling techniques can make your cookies look even more personalized! Enjoy the chocolaty masterpiece you’ve just created.
And there you have it! Your Chocolate Thumbprint Cookies are ready to impress. Whether you’re serving these to guests or enjoying them with a cup of coffee, they’re a guaranteed hit. Happy baking!
Variations on Chocolate Thumbprint Cookies
Indulge in Peanut Butter Thumbprint Cookies
If you love the richness of chocolate, why not mix it up with a creamy twist? Peanut butter thumbprint cookies combine the nutty goodness of peanut butter with the beloved chocolate center. Simply replace half of the butter in your recipe with peanut butter. As you press your thumb into the dough, fill the center with a generous dollop of your favorite chocolate ganache or peanut butter chocolate spread. This delectable fusion will have your taste buds dancing!
Seasonal Variations with Different Toppings
Switching up your toppings is an easy way to craft unique variations of your chocolate thumbprint cookies. Depending on the season, you can personalize each batch with delightful add-ins:
- Spring: Use fresh fruit preserves like raspberry or apricot for a burst of fruity flavor.
- Summer: Top with a sprinkle of sea salt and caramel for that perfect sweet-and-salty bite.
- Autumn: Infuse your cookies with a touch of pumpkin spice and add a swirl of maple syrup or pecan pieces in the center.
- Winter: Fill with peppermint mocha ganache or eggnog-flavored frosting for a cozy, festive treat.
By selecting different fillings and toppings, your chocolate thumbprint cookies can become a year-round go-to for any occasion. Not only do these variations add flavor, but they also keep your cookie game fresh and exciting!
For a deeper dive into flavor pairings and seasonal baking, consider checking out Serious Eats or The Kitchn. Happy baking!
Baking tips for Chocolate Thumbprint Cookies
Measuring flour correctly
When making Chocolate Thumbprint Cookies, the precision of your ingredients can make or break your batch. Start by using the spoon-and-level method: scoop flour into your measuring cup using a spoon, then level it off with a knife. This ensures you’re not packing it in, which can lead to dense cookies. A kitchen scale can be a great investment, as it allows you to measure ingredients by weight for even more accuracy.
Ensuring perfect baking time
Baking times can vary based on your oven and even the size of your cookies, so keep a close eye on them. Start checking your Chocolate Thumbprint Cookies a few minutes before the recommended time. When they’re set around the edges but still soft in the middle, it’s time to pull them out. Remember, they’ll continue to firm up as they cool. For more baking time tips, check out the Pillsbury Baking Guide.
Happy baking!
Serving Suggestions for Chocolate Thumbprint Cookies
Pairing with Coffee or Tea
If you’re looking to elevate your chocolate thumbprint cookies, pairing them with a hot cup of coffee or tea can create a delightful experience. The rich, chocolaty goodness contrasts beautifully with the robust flavors of coffee—try a bold espresso or a smooth latte. For tea lovers, a warm chai or calming chamomile can be the perfect accompaniment, balancing the sweetness of the cookies. And let’s be honest—who doesn’t love indulging in a sweet treat during their afternoon pick-me-up?
Creative Presentation Ideas for Gatherings
When it comes to serving your chocolate thumbprint cookies, presentation matters! Consider a beautiful platter lined with parchment paper, creating a rustic yet inviting look. You could also use decorative boxes or jars to gift them to friends or family, making your cookie creations feel extra special. For gatherings, display these little delights on a tiered cake stand, surrounded by fresh berries or edible flowers. This setup adds a pop of color and elevates the overall experience. Don’t forget to check out more creative serving ideas to make your cookies stand out!
Time details for Chocolate Thumbprint Cookies
When gearing up to bake these delectable Chocolate Thumbprint Cookies, having a clear timeline is crucial. Here’s a helpful breakdown to keep your cookie-making process smooth and enjoyable:
Preparation time
Getting everything ready takes about 15 minutes. This includes gathering your ingredients, measuring them out, and mixing the dough.
Chilling time
To ensure the cookies maintain their shape, allow the dough to chill in the refrigerator for at least 30 minutes. This step is not just a suggestion—it helps the flavors meld beautifully.
Baking time
Once chilled, pop those cookies in the oven for about 12-15 minutes. You’ll want to keep an eye on them as baking times can vary depending on your oven.
Total time
In total, expect to spend around 1 hour (including prep, chilling, and baking) before you can indulge in your homemade Chocolate Thumbprint Cookies. For tips on enhancing flavor profiles, check out resources from culinary experts like Serious Eats. Happy baking!
Nutritional Information for Chocolate Thumbprint Cookies
Calories Per Cookie
When you indulge in one of these delightful Chocolate Thumbprint Cookies, you can expect to consume about 100 calories per cookie. This makes them a moderate treat, perfect for satisfying a sweet tooth without derailing your diet.
Key Nutrients and Health Considerations
These cookies are not just a guilty pleasure; they also pack in some key nutrients:
- Healthy Fats: Using high-quality chocolate can provide healthy fats, essential for energy.
- Antioxidants: Dark chocolate is rich in antioxidants, which are known to help combat oxidative stress.
- Fiber: Depending on the flour used, you can incorporate whole grains for added fiber.
While it’s important to enjoy these cookies in moderation, consider pairing them with a glass of milk for a balanced snack. Curious about how to enhance the nutritional profile even further? Check out resources from the American Heart Association for tips on making healthier dessert choices.
So the next time you’re reaching for a treat, think of these Chocolate Thumbprint Cookies—a delicious combination of taste and nutrition!
FAQs about Chocolate Thumbprint Cookies
Can I make these cookies gluten-free?
Absolutely! Making Chocolate Thumbprint Cookies gluten-free is quite simple. You can substitute regular all-purpose flour with a gluten-free blend, such as almond flour or a gluten-free all-purpose flour like Bob’s Red Mill. Just make sure that any additional ingredients, like the chocolate used for filling, are also labeled gluten-free. Enjoying these delicious treats without the gluten shouldn’t be a problem at all!
What can I use instead of chocolate chips?
If you’re not a huge fan of chocolate chips, there are several alternatives you can try. Chopped nuts, like pecans or walnuts, add a lovely crunch and nutty flavor. You could also swap in caramel, peanut butter, or even fruit preserves for a delightful twist. If you’re looking to keep it chocolatey but want something different, consider using dark chocolate or white chocolate chips to change the flavor profile while still making Chocolate Thumbprint Cookies.
How do I store leftover cookies?
To keep your Chocolate Thumbprint Cookies fresh and delicious, store them in an airtight container at room temperature. They should last about a week (if they last that long!). For extended freshness, consider freezing them. Just stack the cookies between layers of parchment paper, then place them in a freezer-safe container. They can easily be thawed at room temperature when you’re ready for another bite.
For more tips on cookie storage, check out resources on The Kitchn. Enjoy your baking adventures!
Conclusion on Chocolate Thumbprint Cookies
Encouragement to Try These Delicious Treats
If you’re looking for a delightful dessert that’s both easy to make and universally loved, Chocolate Thumbprint Cookies should be at the top of your list! These cookies are perfect for everything from casual get-togethers to the most festive of celebrations. Not only do they satisfy your sweet tooth, but they also offer a fun baking experience. Imagine the joy of creating these little edible masterpieces—who could resist?
So grab your ingredients, invite a friend, and enjoy a cozy baking session. For more tips and ideas, check out resources like Food Network and BBC Good Food. Happy baking!
Chocolate Thumbprint Cookies: The Best Indulgent Treat for All

Indulge in the rich, chocolatey goodness of these Chocolate Thumbprint Cookies. Perfect for any occasion!
- Prep Time: 20 minutes
- Cook Time: 15 minutes
- Total Time: 35 minutes
- Yield: 24 cookies 1x
- Category: Dessert
- Method: Baking
- Cuisine: American
- Diet: Vegetarian
Ingredients
- 1 cup unsalted butter
- 1 cup granulated sugar
- 2 cups all-purpose flour
- ½ cup unsweetened cocoa powder
- 1 tsp vanilla extract
- ½ cup chocolate chips, for filling
Instructions
- Preheat oven to 350°F (175°C).
- In a large bowl, cream together the butter and sugar until smooth.
- Mix in the flour, cocoa powder, and vanilla until combined.
- Roll dough into small balls and place them onto a baking sheet.
- Make an indentation in the center of each cookie.
- Fill the indents with chocolate chips.
- Bake for 12-15 minutes or until set.
- Let cool before serving.
Notes
- For extra flavor, consider adding a pinch of sea salt on top before baking.
- These cookies can be chilled to firm up the dough if it’s too soft to handle.
Nutrition
- Serving Size: 2 cookies
- Calories: 150
- Sugar: 10g
- Sodium: 50mg
- Fat: 8g
- Saturated Fat: 5g
- Unsaturated Fat: 3g
- Trans Fat: 0g
- Carbohydrates: 18g
- Fiber: 1g
- Protein: 2g
- Cholesterol: 30mg
Keywords: Chocolate Thumbprint Cookies