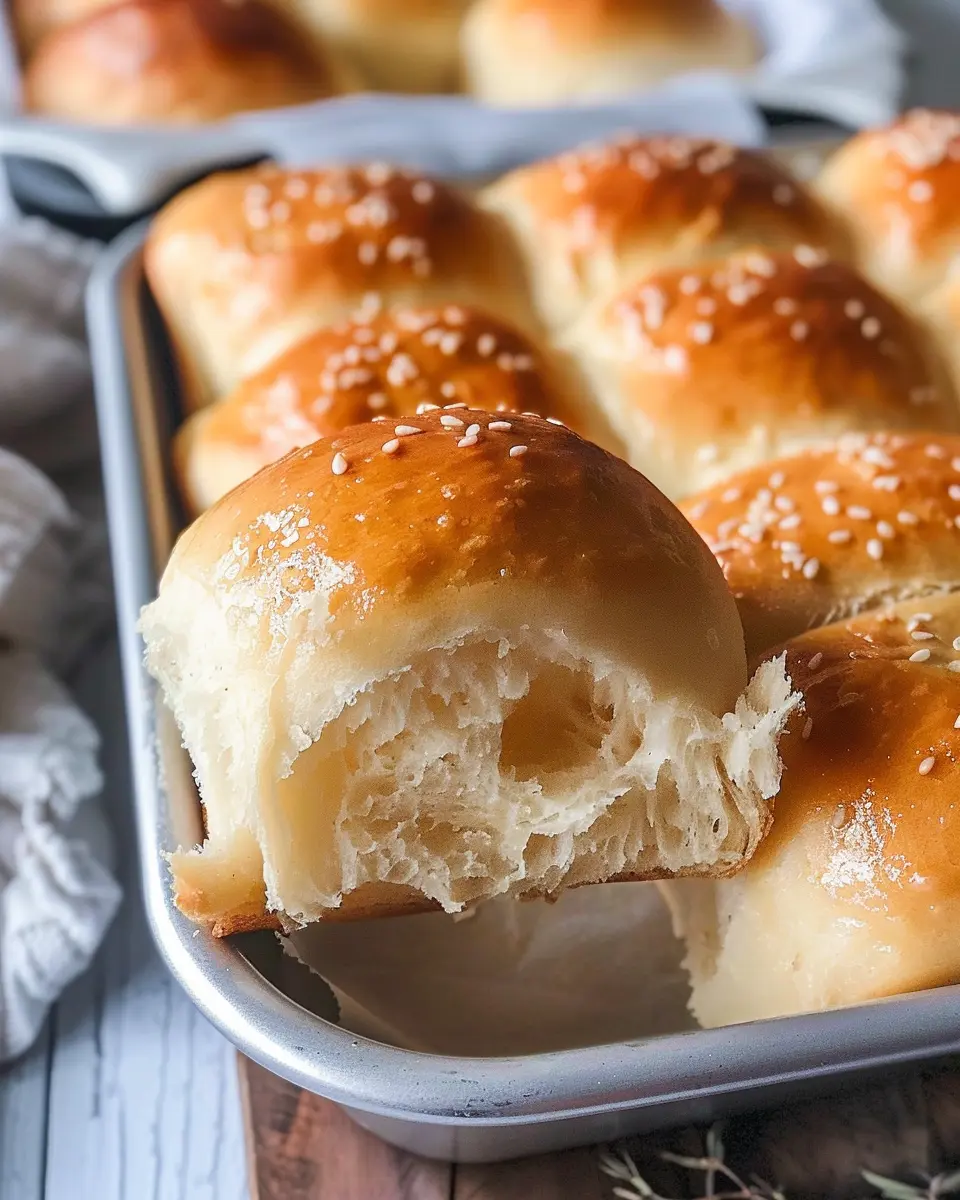
Introduction to Bulochka Recipe
Are you on the lookout for a delightful baked treat that’s both simple and satisfying? If so, you’re in for a real treat with bulochki! These traditional Russian sweet rolls are not only fluffy and delicious but also incredibly versatile. Whether you want to enjoy them for breakfast, as a snack, or even dessert, mastering the bulochka recipe will surely impress your friends and family.
What are Bulochki and Why are They Worth Making?
Bulochki (or single bulochka) are soft, yeast-based pastries often filled with a variety of sweet or savory fillings. Think of them as the charming cousins of doughnuts or brioche—rich, airy, and simply irresistible. You might wonder, “What makes these rolls so special?” Here’s a quick rundown of their appeal:
- Versatility: Fill them with your favorite ingredients! From sweet jams and chocolate to savory options like turkey bacon or chicken ham, the possibilities are endless.
- Easy to make: While they may sound fancy, you don’t need to be a master chef to whip these up. With a few simple ingredients and some patience, you’ll have a batch ready to enjoy.
- Cultural touch: Incorporating bulochki into your culinary repertoire allows you to explore the rich tapestry of Russian cuisine. Plus, it’s a fun way to show off your baking skills at gatherings!
Many bakers note that the combination of textures and flavors in a fresh bulochka can elevate a simple meal or coffee break into something memorable. It’s no surprise that these rolls find a special place in Russian culture. As you prepare to make your first batch, think of it as an opportunity to create something heartwarming and share it with loved ones.
If you’re intrigued and ready to dive into this delicious adventure, you’ll find that this bulochka recipe isn’t just about baking; it’s about embracing the joy of cooking, the thrill of experimentation, and the pleasure of sharing your creations. Let’s roll up our sleeves and get started! For a more in-depth understanding of the cultural significance of these pastries, consider checking out some resources like The Spruce Eats and Serious Eats.
Ingredients for Bulochka Recipe
Essential ingredients for bulochki dough
Creating the perfect bulochki starts with the right dough. Here’s what you’ll need:
- Flour: 4 cups of all-purpose flour will form the base.
- Yeast: 2 tablespoons of active dry yeast for that fluffy texture.
- Milk: 1 cup of warm milk to activate the yeast.
- Sugar: 1/2 cup to add a touch of sweetness.
- Salt: 1 teaspoon enhances overall flavor.
- Eggs: 2 large eggs for richness.
- Butter: 1/2 cup of softened butter, giving the dough a lovely flavor.
Flavorful filling options
The fillings can really elevate your bulochka experience! Consider these delicious combinations:
- Turkey Bacon & Cheese: A savory option for meat lovers.
- Chicken Ham & Spinach: A great way to incorporate some greens.
- Sweet options: Try jam, chocolate, or even a custard filling for dessert bulochki.
Topping ingredients for the perfect finish
Don’t skip the topping—it’s the cherry on top of your delicious bulochka! You might need:
- Egg wash: An egg and a splash of milk for that golden sheen.
- Sesame seeds: A sprinkle adds delightful crunch.
- Powdered sugar: Perfect for sweet bulochki, adding a finishing touch.
By focusing on these elements, you’re on your way to creating fantastic bulochki. Be sure to check out this guide to baking basics for more tips on working with dough!
Step-by-step Preparation for Bulochki
Making your own bulochki at home can be a delightful culinary experience. However, if you’re new to the kitchen or just want to refresh your skills, don’t worry! This section will guide you through each step of the bulochka recipe with clarity and enthusiasm. By the end, you’ll be ready to impress yourself and anyone lucky enough to share your kitchen.
Prepare the dough mix
Start by gathering your dry ingredients to build the foundation of your bulochki. You’ll need:
- 4 cups of all-purpose flour
- 1 packet (2¼ teaspoons) of instant yeast
- ¼ cup of sugar
- 1 teaspoon of salt
In a large mixing bowl, combine the flour, instant yeast, sugar, and salt. Whisk it together to ensure even distribution. This blend creates a light and airy base for your sweet rolls. Instant yeast is a game changer; it simplifies the rising process, allowing you to dive right into baking.
Incorporate wet ingredients and knead the dough
Next, it’s time for the wet ingredients! In a separate bowl, combine:
- 1 cup of warm milk (about 110°F)
- ¼ cup of melted butter
- 1 large egg
- 1 teaspoon of vanilla extract
Whisk these ingredients until they’re smooth and blended. Gradually pour the wet mixture into your dry ingredients, mixing with a spoon until it starts to come together. Now comes the fun part—kneading!
Transfer the dough onto a lightly floured surface, and knead it for about 8-10 minutes. You want to develop the gluten, which will give your bulochki that delightful fluffy texture. Aim for a smooth and elastic dough. If it’s too sticky, sprinkle in a bit more flour as needed.
Allow the dough to rise
Once your dough is ready, place it in a lightly greased bowl, cover it with a damp cloth, and let it rise in a warm place for about an hour. Ideally, you’re looking for the dough to double in size. This is where the magic happens! During this time, you might think about what delicious fillings you’d like to include. Perhaps a cream cheese mixture or sweetened fruit preserves?
Shape and fill the bulochki
After the dough has risen beautifully, punch it down gently to remove excess air. Roll it out into a large rectangle, about half an inch thick. Cut this rectangle into squares, and then add your preferred filling—whether it’s a delightful mix of sweet cheese or a savory blend with turkey bacon and chicken ham. Fold the corners of the squares toward the center and pinch them to seal.
Arrange on a baking sheet and let rise again
Place your shaped bulochki onto a parchment-lined baking sheet, ensuring they’re spaced out. Cover them again with a cloth and allow them to rise for another 30 minutes. This second rise is crucial for achieving that light and airy texture. Preheat your oven to 375°F so it’s ready for the final baking stage!
Prepare glaze and crumb topping
While your rolls are rising, you can prepare a simple glaze using:
- 1 egg (beaten)
- 1 tablespoon of milk
Mix together for a shiny finish when baked. Additionally, you might consider adding a crumb topping made from a combination of flour, sugar, and a bit of butter for extra crunch.
Bake the bulochki to perfection
Once your bulochki have risen again, brush them gently with the egg wash and sprinkle the crumb topping over the top. Pop them into your preheated oven and bake for about 15-20 minutes or until they are golden brown. The aroma that wafts through your kitchen is sure to make everyone a little curious about your culinary skills!
Once done, let them cool for a few minutes before enjoying your creations. Whether for breakfast or a snack, these bulochki are sure to be a hit. Remember, baking is as much about the joy of creation as it is about the end result, so relish every step of this delightful experience!
Don’t forget to check out this guide on yeast dough for additional tips and techniques to elevate your baking game. Happy baking!
Variations on Bulochki
Bulochki are incredibly versatile, and once you’ve mastered the basic bulochka recipe, why not experiment with different fillings? Here are a few delightful variations that not only add flair but also cater to a range of tastes.
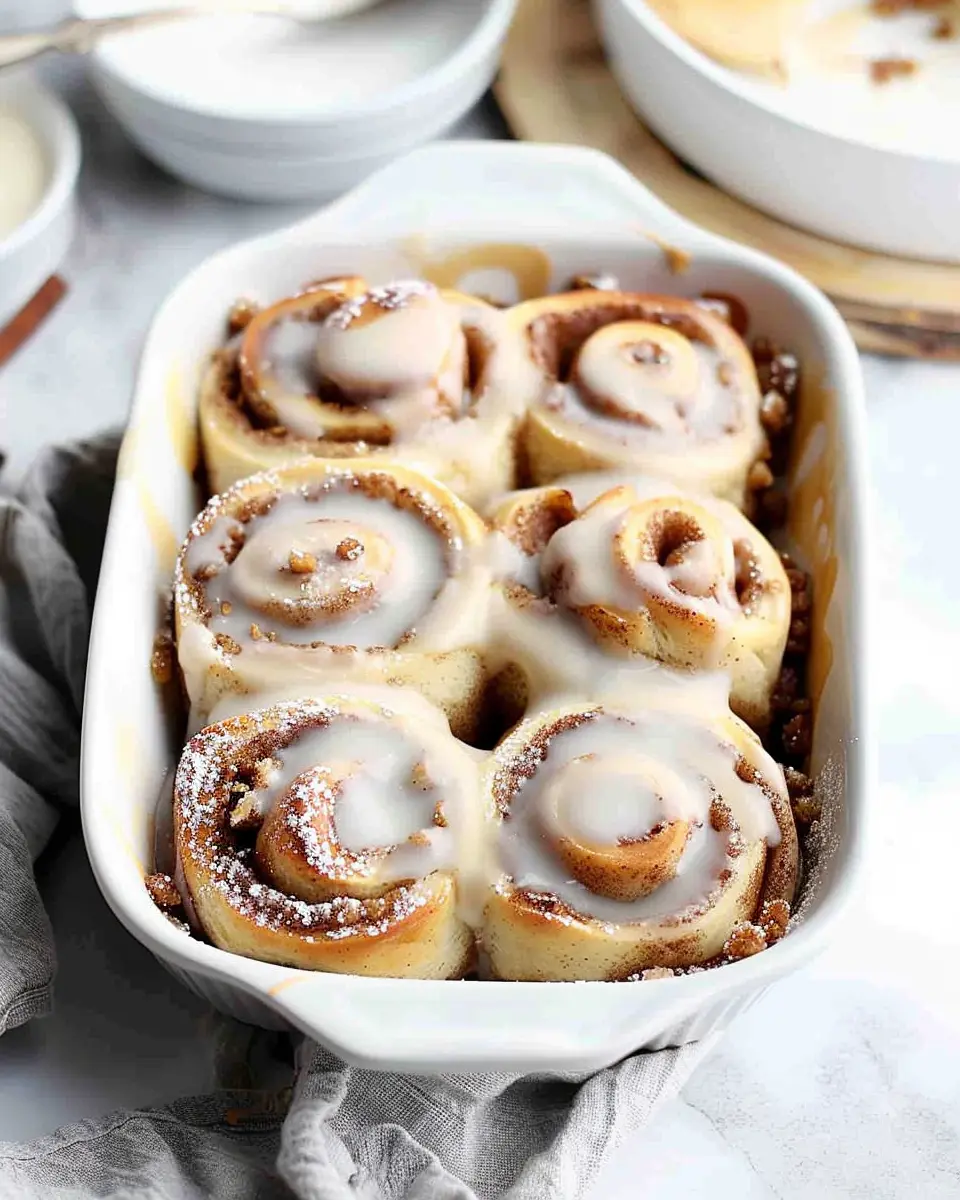
Classic Jam-Filled Bulochki
One of the most beloved fillings is fruit jam. Whether you gravitate towards strawberry, raspberry, or apricot, the sweet-tart flavor mingling with the pillowy dough is irresistible. Simply spread a teaspoon of your favorite jam before you roll the dough into a bun shape. Bake until golden, and you’ll have a delightful treat perfect for breakfast or an afternoon snack. For an extra touch, dust the finished bulochki with powdered sugar—your friends will think you’re a pastry chef!
Nutella and Walnut Bulochki
If you’re a chocolate lover, then Nutella and walnut bulochki are your go-to choice. Spread a generous layer of Nutella over the dough, sprinkle with chopped walnuts for a satisfying crunch, and then roll and shape as usual. The combination of gooey chocolate and the rich, nutty flavor of walnuts will melt in your mouth. You might want to double the batch; these will disappear quickly!
Sweet Farmer’s Cheese and Fruit Bulochki
For a deliciously creamy filling, opt for sweet farmer’s cheese mixed with your choice of fresh or dried fruits, like blueberries or raisins. This combination offers a high-protein boost to your bulochka, making it perfect for a wholesome breakfast or dessert. Just mix the cheese with a little sugar and vanilla, fold in the fruits, and let the dough work its magic.
Experimenting with fillings is part of the fun. With each variation, you create a delightful spin on the traditional bulochka recipe. Explore more about flavor pairings and discover a world of possibilities!
Baking Tips and Notes for Bulochki
Ensuring the Right Dough Consistency
Getting the dough consistency just right is crucial for your bulochki. Aim for a smooth, slightly sticky texture that’s easy to handle. If your dough feels too wet, don’t panic! Just sprinkle a little flour while kneading until it reaches that perfect balance. You can check out this guide on dough consistency for more tips!
Importance of Evenly Sized Pieces
Cutting your dough into evenly sized pieces helps ensure that your bulochki bake uniformly. This way, you won’t end up with some overly browned and others undercooked—nobody likes a dry pastry! Use a kitchen scale if you have one for precise measurements, or just eyeball it and have fun with it!
Best Practices for Using Softened Butter
When your recipe calls for softened butter, make sure it’s at room temperature—the key is to achieve that creamy texture that blends seamlessly into your dough. A quick tip is to cut the butter into smaller chunks to speed up the softening process. For more, consider checking out food safety guidelines when handling dairy products during baking.
With these tips, you’ll be well on your way to mastering the bulochka recipe!
Serving Suggestions for Bulochki
Pairing Bulochki with Beverages
When you treat yourself to these delightful bulochki, choosing the right beverage can significantly enhance your experience. Consider pairing your warm, flaky pastries with a robust cup of coffee or herbal tea. A creamy chai latte complements the buttery flavor perfectly, while a fresh juice, like orange or pomegranate, can add a refreshing contrast. Want to explore more options? Check out this guide on the best beverages to accompany pastries here.
Creative Ways to Serve Bulochki at Gatherings
Hosting friends or family? Make your bulochka recipe the star of your next gathering! Here are a few creative ideas to elevate your serving game:
- Bulochki Bar: Set up a station where guests can choose spreads like honey, butter, or cream cheese, providing an interactive experience.
- Petite Sandwiches: Use bulochki as a base for mini sandwiches with fillings like turkey bacon or chicken ham, perfect for brunch or casual afternoon gatherings.
- Dessert Twist: Sprinkle powdered sugar on top or serve with a side of fruit compote for a sweet treat.
These little touches can turn your bulochki into a highlight of any event! Remember, the right presentation can make all the difference in turning simple snacks into memorable moments.
Time Breakdown for Making Bulochki
Preparation time
Getting started on your bulochka recipe is quite simple! Allocate about 30 minutes for preparation. This includes gathering your ingredients, mixing the dough, and shaping the bulochki. The more organized you are, the smoother this process will be.
Rising time
After you prepare the dough, it needs some love to rise. Set aside approximately 1 hour for it to double in size. Be patient here; this step is crucial for achieving those fluffy, delightful rolls. You can use this time to unwind or prep any fillings you’d like!
Baking time
Once your bulochki have risen, it’s time to bake! This will take around 20-25 minutes in the oven. The aroma that fills your kitchen during this time is absolutely worth it—trust me!
Total time
In total, you’re looking at about 2 hours total from start to finish. This makes it manageable enough for a weekend baking project or when you want to impress friends with your culinary skills. For more tips on baking techniques, consider checking out resources from The Kitchn or Serious Eats.
Nutritional Facts for Bulochki
Calories per serving
A typical serving of bulochki contains approximately 150-200 calories. This makes them a delightful treat to enjoy without straying too far from your health goals.
Key nutrients
These soft pastries provide essential nutrients, including:
- Carbohydrates: Ideal for energy
- Protein: Aids muscle repair and growth
- Fiber: Promotes digestive health
For more detailed insights on the nutritional value of common ingredients, check resources like the USDA FoodData Central.
Potential allergens
When making your bulochka recipe, be mindful of common allergens, such as:
- Wheat (gluten)
- Eggs
- Dairy
If you’re hosting friends or family with food sensitivities, consider alternatives to accommodate them—gluten-free flours or plant-based milk can be great substitutes! Always ask about dietary restrictions to ensure everyone enjoys this sweet delight.
FAQs about Bulochki
What if my dough is too sticky?
If you find your dough is a bit too sticky while making your bulochka recipe, don’t worry! This can happen, especially in humid conditions. Here’s what you can do:
- Add Flour Gradually: Start by sprinkling a little all-purpose flour on your work surface and fold it into the dough. Be sure to do this slowly to avoid over-flouring, which can lead to dryness.
- Knead Gently: Kneading the dough for an extra few minutes can also help it come together. You want a smooth and elastic texture without being overly wet.
Can I freeze unbaked bulochki?
Absolutely! Freezing unbaked bulochki is a great way to meal prep. Just shape the dough into your preferred forms, then place them on a parchment-lined baking sheet. Freeze until solid, and then transfer them to a freezer bag. They can be baked straight from the freezer—just add a few extra minutes to the baking time!
How do I know when they are fully baked?
Perfectly baked bulochki should have a golden-brown top and feel light when lifted. If you’re unsure, insert a toothpick into the center; it should come out clean or with just a few crumbs.
What are some good substitutes for the filling?
If you’re looking to customize your filling, consider these delicious options:
- Veggies: Spinach and feta make a wonderful, savory combination.
- Fruit: Try sweetened cream cheese with berries for a dessert twist.
- Turkey Bacon or Chicken Ham: These can add a flavorful kick to your bulochka recipe, perfect for a brunch dish.
Feeling adventurous? Experimenting with fillings can lead to delightful surprises! For tips on selecting fillings, you can check out this resource on flavor combinations.
Overall, don’t hesitate to put your own spin on this classic recipe—your kitchen is the best place for culinary creativity!
Conclusion on Bulochka Recipe
Final thoughts on making bulochki at home
Making a delightful bulochka recipe at home can be an incredibly rewarding experience. As you mix, knead, and watch the dough rise, you’ll feel connected to time-honored traditions. The sweet aroma wafting through your kitchen will surely make your space feel inviting.
Remember, personalizing your bulochki—whether you fill them with turkey bacon, chicken ham, or a touch of your favorite jam—can elevate your creations. Don’t hesitate to experiment with flavors that resonate with your palate. So, gather your ingredients, invite some friends over, and enjoy this unique baking adventure! For more tips, explore resources from culinary experts like Serious Eats or Epicurious.
Bulochka Recipe: Easy and Indulgent Homemade Delights

Learn how to make mouthwatering Bulochka, perfect for any occasion.
- Prep Time: 30 minutes
- Cook Time: 25 minutes
- Total Time: 1 hour 55 minutes
- Yield: 12 rolls 1x
- Category: Baked Goods
- Method: Baking
- Cuisine: Eastern European
- Diet: Vegetarian
Ingredients
- 3 cups all-purpose flour
- 1 cup milk
- 1/2 cup sugar
- 1/4 cup butter, melted
- 2 eggs
- 1 packet active dry yeast
- 1/2 teaspoon salt
Instructions
- In a bowl, combine warm milk, sugar, and yeast. Let it sit for 5 minutes.
- In a separate bowl, mix flour and salt.
- Add melted butter and eggs to the yeast mixture.
- Gradually add flour mixture into the wet ingredients.
- Knead the dough for about 10 minutes.
- Cover and let it rise until doubled, about 1 hour.
- Shape the dough into rolls and place them in a baking dish.
- Let them rise for another 30 minutes.
- Bake at 350°F (175°C) for 20-25 minutes.
- Let cool and serve.
Notes
- For extra flavor, add vanilla extract to the dough.
- Serve with butter or jam.
Nutrition
- Serving Size: 1 roll
- Calories: 180
- Sugar: 6g
- Sodium: 150mg
- Fat: 5g
- Saturated Fat: 2g
- Unsaturated Fat: 2g
- Trans Fat: 0g
- Carbohydrates: 28g
- Fiber: 1g
- Protein: 4g
- Cholesterol: 50mg
Keywords: Bulochka Recipe