Introduction to Mummy Truffles
Halloween is right around the corner, and what better way to celebrate than with mummy truffles? These delightful treats are a fun twist on traditional truffles, dressed up for the spooky season. Picture this: rich chocolate truffles wrapped in creamy white chocolate, with just the right amount of detail to resemble little mummies. They’re not just tasty; they also bring a festive touch to your Halloween festivities, making them a perfect centerpiece for any gathering.
Why Mummy Truffles are the Perfect Halloween Treat
Why choose mummy truffles for your Halloween celebrations? Well, for starters, they’re incredibly easy to make. Even if you’re not a seasoned baker, with just a few simple steps, you can create these eye-catching sweets that will impress both kids and adults alike. Plus, they’re a sensational way to indulge your sweet tooth without spending hours in the kitchen.
Another plus? The ingredients are versatile. You can use dark or milk chocolate for the truffle center, allowing you to customize the flavors to your liking. For added fun, consider integrating different fillings such as caramel or chocolate ganache. The choice is yours! If you’re curious about chocolate alternatives or gourmet options, check out The Chocolate Life for some delightful insights.
Not only do mummy truffles bring a smile to your face with their whimsical design, but they also offer the perfect opportunity for creative expression. You can gather your friends or family for a little truffle-making party, where everyone can add their special touch to their mummies. Imagine the laughter and joy as you all get messy with the melting chocolate!
Additionally, these treats are sure to be a conversation starter at any Halloween party. Guests will be fascinated by how you crafted these cute delights, and they might even ask for your recipe! The best part? They can be made ahead of time and stored in the fridge, allowing you to enjoy more of your spooky festivities without stress. So go ahead, unleash your inner baker, and let’s create some unforgettable mummy truffles that will turn your Halloween into a deliciously sweet event!
Ingredients for Mummy Truffles
Essential ingredients for spooky delights
Creating your spooky mummy truffles starts with a handful of essential ingredients that will set the stage for a deliciously fun treat. Here’s what you’ll need:
- Chocolate Base: 1 cup of semi-sweet chocolate chips will provide that rich, creamy flavor.
- Cream Cheese: 8 oz, softened to help bind the ingredients and add a delightful tang.
- Powdered Sugar: 1 cup adds sweetness and texture, making the truffles irresistibly smooth.
- Vanilla Extract: 1 teaspoon enhances the flavors beautifully.
These foundational ingredients ensure your mummy truffles taste amazing while achieving that perfect texture for molding.
Optional ingredients for added flair
Once you have your essentials, consider adding some fun touches! Optional ingredients can elevate your mummy truffles and make them visually appealing:
- Turkey Bacon: Crispy bits can mimic mummy bandages and lend a salty crunch.
- White Chocolate: For drizzling or dipping; it creates a lovely contrast when detailing your mummies.
- Sprinkles: Halloween-themed sprinkles can add playful color.
Each of these additions can enhance not only the presentation but also customize the flavors to your liking. Why not let your creativity shine? For more inspiration, check out some expert tips on garnishing desserts here.
Step-by-Step Preparation of Mummy Truffles
Creating mummy truffles is equal parts fun and culinary creativity. These spooky little treats are perfect for Halloween parties or just a festive treat to enjoy at home. Below, I’ll guide you through each simple step to make these enticing white chocolate-covered delights.
Preparing the Baking Sheet
Before diving into the fun part, let’s get our space ready. Start by lining a baking sheet with parchment paper. This will ensure the truffles don’t stick and make for easy cleanup later. If you have a silicone baking mat, that’s an even better option! Make sure you have a little extra space for cooling once you start dipping your truffles.
Crumbling the Oreo Cookies
Grab your Oreo cookies and get ready to unleash your inner baker! You’ll need about a package of regular Oreos for this recipe. Place them in a large zip-top bag and crush them until they resemble fine crumbs. You can use a rolling pin for this, enjoy the satisfying crunch, or put them in a food processor for ease. If you’re a fan of culinary techniques, using a food processor can save you some manual labor and give you a more uniform crumb.
For a fun twist, try substituting regular Oreos with gluten-free versions if you’re catering to dietary restrictions. This little change can make your mummy truffles accessible to more of your friends and family.
Mixing in the Cream Cheese
Now that we have our cookie crumbs, it’s time for the creamy goodness. Take an 8-ounce block of cream cheese (make sure it’s softened) and mix it in with the Oreo crumbs in a large bowl. Use a spatula or your hands to bring everything together until it forms a thick, cohesive dough-like mixture.
This step is crucial—if the mixture is too crumbly, you won’t be able to roll it into balls. Conversely, if it’s too wet, simply add a few more crushed cookies. It’s all about achieving that perfect balance!
Rolling the Truffle Balls
This step is where the magic begins. Use your hands to scoop out tablespoon-sized portions of the mixture and roll them into balls. Aim for them to be roughly the same size for uniformity, as this helps during the dipping process. Placing them on the prepared baking sheet once rolled, continue until all the mixture is transformed into truffles.
Here’s a tip: If you’re having issues with the mixture sticking to your hands, a light dusting of powdered sugar can help keep things manageable.
Chilling the Truffles
With your mummy truffles shaped and ready, it’s time for a little break in the fridge. This step is essential because chilling helps set the truffles, making them firmer and easier to coat later. Let them chill for about 30 minutes. While you wait, you might grab some cozy socks and put on your favorite series—work for those truffles, right?
Melting the White Chocolate
After chilling, it’s time to melt some white chocolate. You’ll need about 12 ounces of white chocolate chips. You can either use a double boiler or a microwave-safe bowl for this step. If using the microwave, melt the chips in 20-second intervals, stirring in between to avoid scorching them.
Melted white chocolate is the perfect outer layer for your mummy truffles, giving them that ghostly appearance and sweet touch.
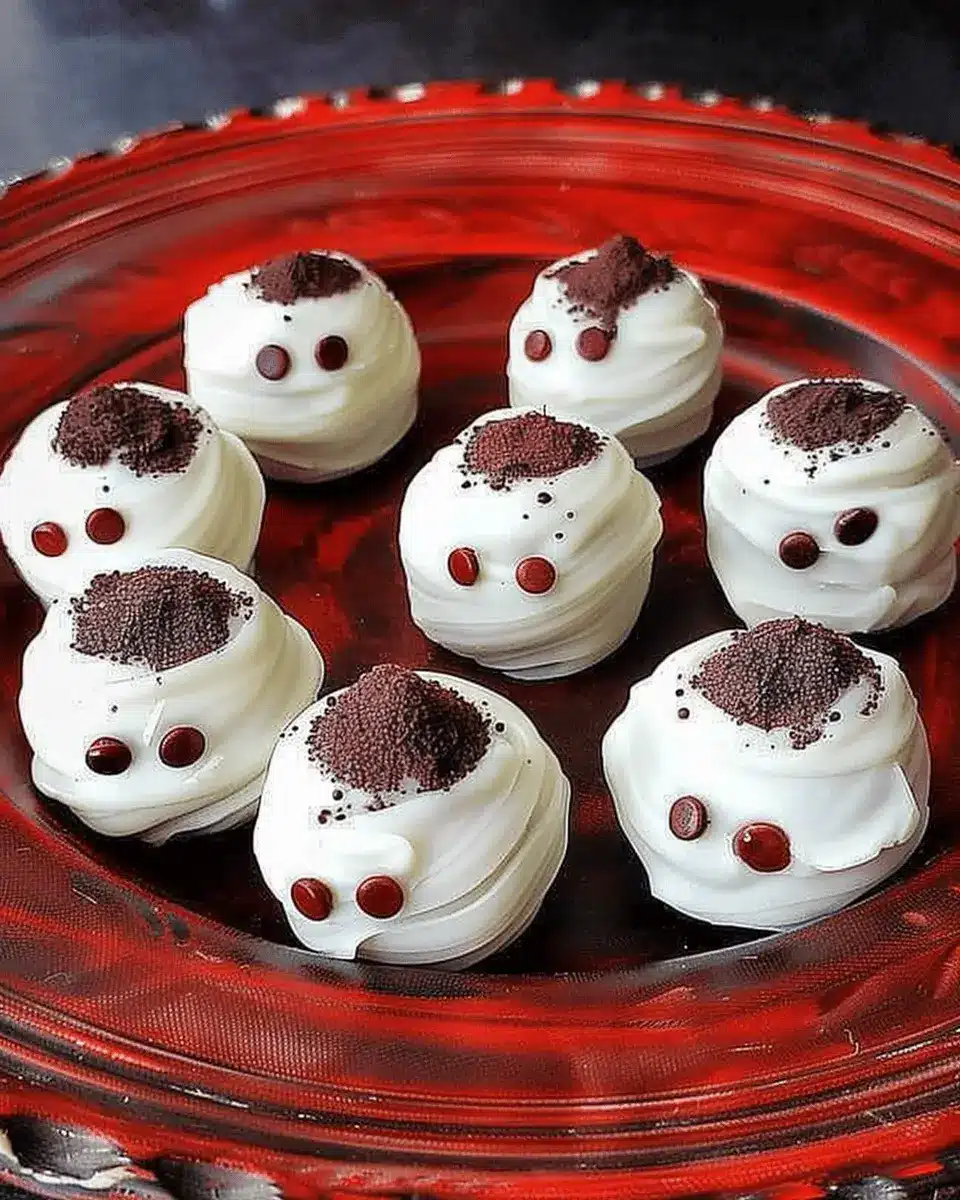
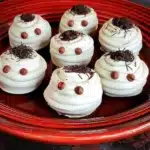
Dipping and Decorating the Truffles
Now comes the fun part—dipping! Use a fork to dip each truffle into the melted white chocolate, ensuring it’s fully coated. Allow the excess chocolate to drip off before placing the truffles back on the baking sheet.
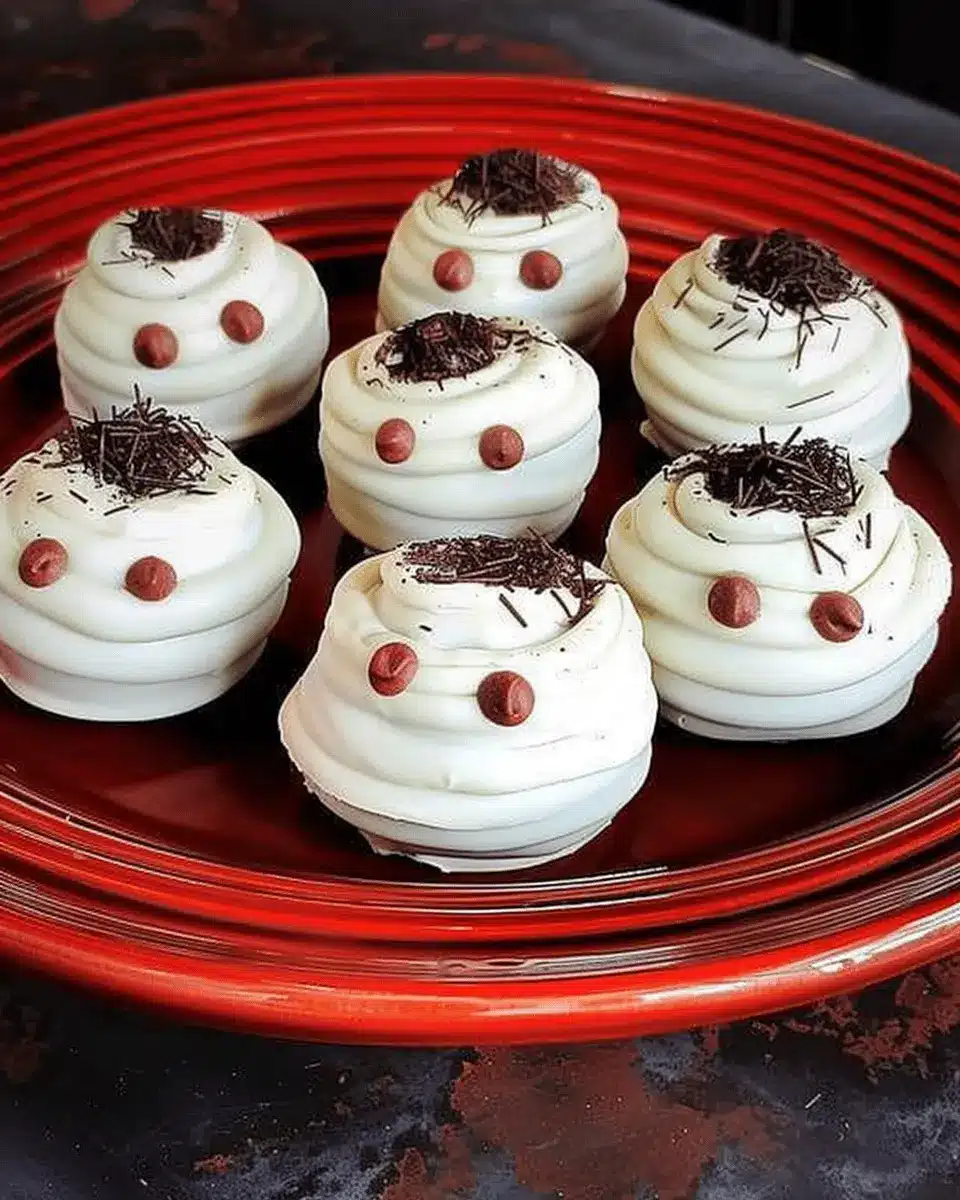
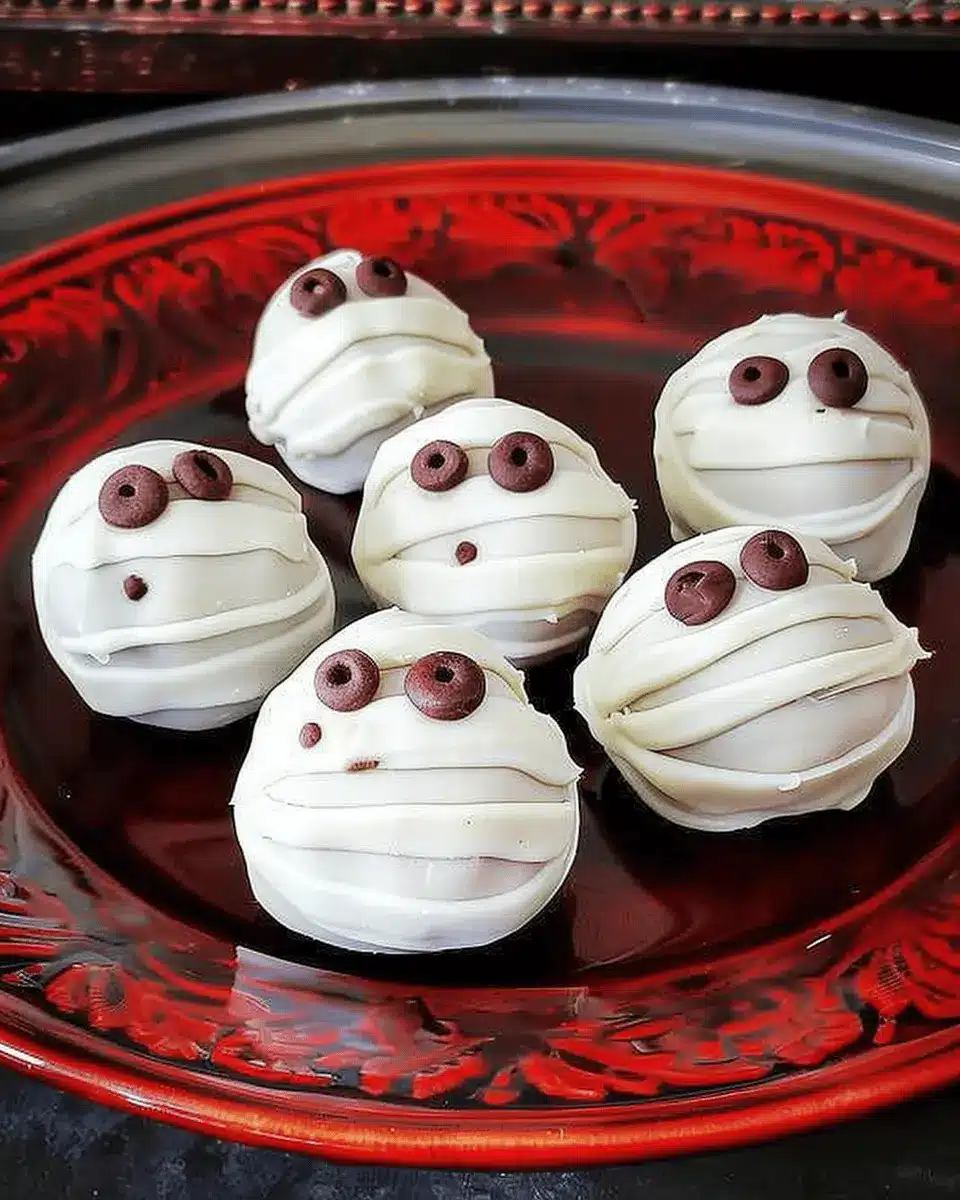
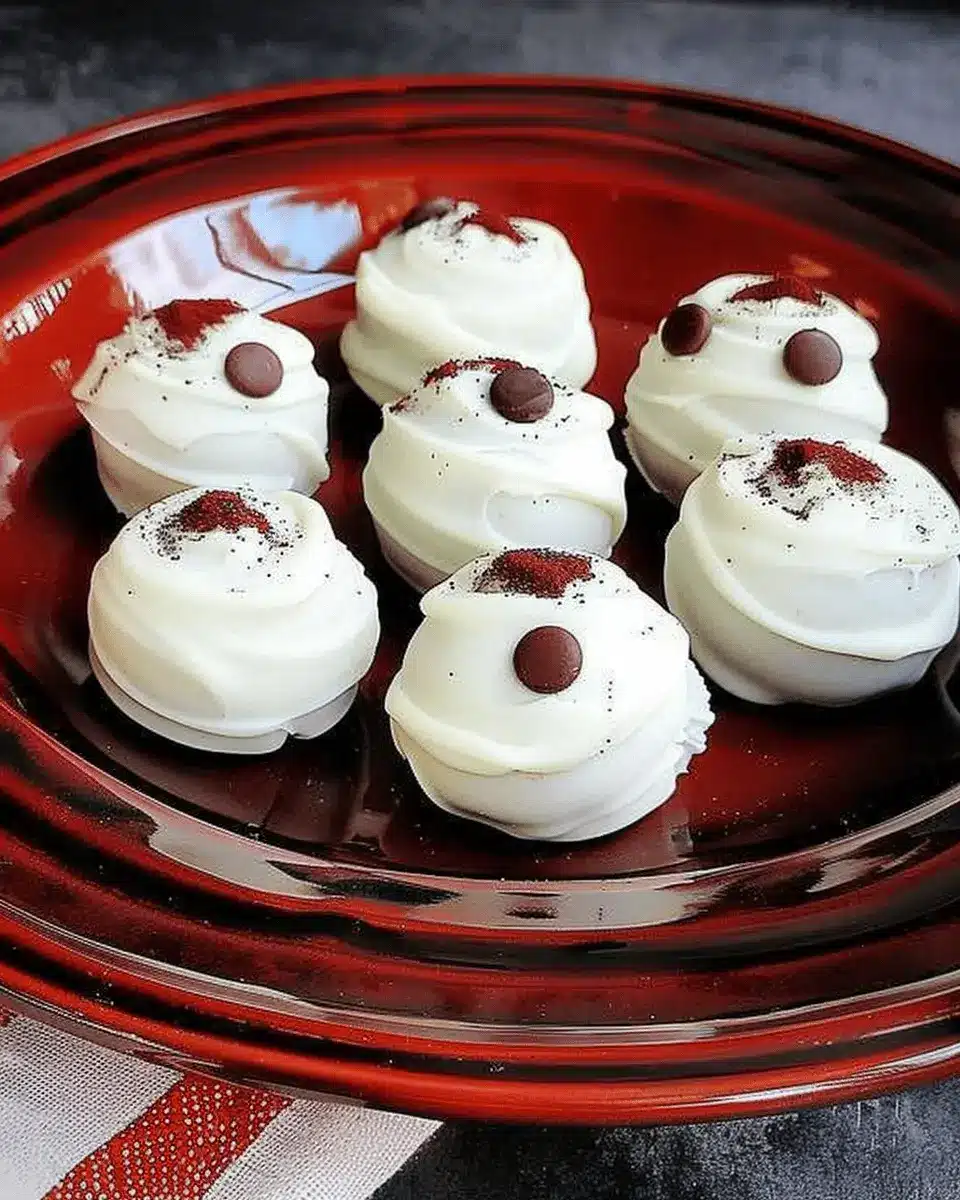
Once all are dipped, take some extra melted chocolate and drizzle it over the truffles to create the “bandage” appearance. Add miniature candy eyes for a spooky touch.
After all that work, place the truffles back in the fridge for about 10 minutes until the chocolate hardens.
And there you have it! Your mummy truffles are ready to impress at any gathering or surprise family at home. Enjoy this Halloween treat with a cozy beverage like hot cocoa or a spiced cider. For more fun ideas and variations, check out Food Network or Serious Eats for inspiration. Happy snacking!
Variations of Mummy Truffles
Exploring different flavors adds a unique twist to mummy truffles, allowing you to tailor them to your taste buds or seasonal cravings. Let’s dive into two delightful variations that are sure to add festive flair to your gatherings.
Peanut Butter Mummy Truffles
If you’re a peanut butter lover, this variation is a game-changer. Start with a base of creamy peanut butter mixed with crushed graham crackers and a touch of powdered sugar to add sweetness. These ingredients create a decadent, nutty center that’s simply irresistible. Once you shape them into little balls, dip them in white chocolate and let it harden. For that classic mummy look, drizzle more melted white chocolate along the top for that hauntingly cute web effect.
Did you know that peanut butter is a fantastic source of protein? As an added bonus, it can also help you feel full longer! Feel free to check out more nutritious ingredient options from Healthline to enrich your baking repertoire.
Pumpkin Spice Mummy Truffles
With autumn in full swing, pumpkin spice mummy truffles become a seasonal favorite. Blend canned pumpkin puree with a mixture of white chocolate, crushed cookies, and pumpkin spice to create a flavorful and festive filling. After rolling the truffles, dip them in white chocolate and decorate them with icing for the mummy features. The flavors of pumpkin and spices are perfect for the season, bringing warmth and coziness to your celebrations.
These variations not only elevate your typical mummy truffles, but they also serve as interesting conversation starters at your next gathering! Which will you try first?
Cooking Tips and Notes for Mummy Truffles
Tips for Rolling the Truffles
When shaping your mummy truffles, a few tricks can make the process much smoother. First, ensure your mixture is well-chilled, as this will prevent it from sticking to your hands. Use a cookie scoop or your hands to form small balls, about an inch in diameter. To make them perfectly round, roll them gently between your palms. If the truffles start to get too warm, pop them back in the fridge for a few minutes.
Notes on Melting Chocolate
Melting the chocolate for your mummy truffles is crucial to achieve that smooth, drizzled look. Whether you use a microwave or a double boiler, slow and steady is the key. If you’re microwaving, heat in 30-second intervals and stir in between to avoid overheating. For reaching that ideal temperature, the chocolate should be around 90 to 95 degrees Fahrenheit. If you’re unsure, check out resources like Culinary Institute of America for excellent tips on mastering chocolate melting techniques.
Happy cooking!
Serving Suggestions for Mummy Truffles
Creative Plating Ideas for Halloween Parties
When it comes to serving mummy truffles, presentation is key. To amp up the spooky factor at your Halloween gathering, consider these creative plating ideas:
- Creepy Dessert Table: Arrange your truffles on a platter surrounded by fake spider webs and plastic spiders for a fun, ghastly touch.
- Mummy Boxes: Use black or orange cupcake boxes to present each truffle as a little mummy gift. Tie them with twine and add a tiny card for a personal touch.
- Spooky Stand: Elevate your truffles on a tiered dessert stand, placing ghost-shaped cookies or pumpkin cupcakes on the lower levels for a cohesive theme.
Pairing Suggestions with Drinks
The right drink can elevate your mummy truffles experience! Try these fun pairings to impress your guests:
- Spiced Apple Cider: Serve warm spiced apple cider to enhance the sweetness of the truffles.
- Mocktail Madness: Create a refreshing non-alcoholic drink with sparkling water, muddled mint, and lime – a perfect palate cleanser between bites.
- Ginger Brews: For those who love a little zing, pair your truffles with a ginger beer. The spice beautifully complements the rich chocolate.
With these serving suggestions, your Halloween party will be one for the books! Looking for more Halloween ideas? Check out Food Network for more creative recipes and decoration tips!
Time Breakdown for Mummy Truffles
When it comes to whipping up a delightful batch of mummy truffles, understanding the timeline can make your kitchen experience far more enjoyable. Here’s how to break down your time effectively:
Preparation Time
Before you dive into creating these delicious treats, set aside about 30 minutes for preparation. This includes gathering your ingredients, melting your chocolate, and rolling your truffles into shape. It’s a fun process where you can really express your creativity!
Chilling Time
The chilling is where the magic happens, as your truffles need about 1 hour in the fridge to firm up perfectly. This step is crucial—it allows those flavors to meld beautifully and gives your truffles a nice texture.
Total Time
In total, you’ll be investing approximately 1 hour and 30 minutes to create your delightful mummy truffles. With minimal prep and an easy cleanup, this treat is perfect for a festive gathering or an after-dinner delight. Ready to impress yourself or your friends with these spooky goodies? Check out this guide on truffle techniques for some additional tips!
Nutritional Facts for Mummy Truffles
Caloric Content
When enjoying mummy truffles, you might be curious about their caloric content. Each truffle typically contains around 150 calories. This makes them a delightful treat that won’t wreck your daily caloric intake if you indulge in moderation. Pairing them with a warm drink or keeping a few on hand for a post-work snack can be a great way to satisfy your sweet tooth.
Macronutrient Breakdown
Mummy truffles are not just fun and festive; they also offer a decent balance of macronutrients:
- Carbohydrates: Approximately 15g per truffle, mostly from the chocolate and cream.
- Protein: Around 2g—thanks to the addition of ingredients like protein-rich nuts or dairy.
- Fats: Generally 10g, mainly from the chocolate and any nut butter used.
Not only do they enliven your dessert table, but they also offer a bit of energy and enjoyment! For more nutritional insights, consider visiting resources like the USDA Nutrition Database to explore how these ingredients stack up against your daily nutritional goals.
By choosing your mummy truffles wisely, you can enjoy a treat that complements your lifestyle without compromising your health goals!
FAQs about Mummy Truffles
How do I store leftover mummy truffles?
If you find yourself with some leftover mummy truffles after a Halloween gathering (lucky you!), storing them properly is key to maintaining their delightful flavor and texture. Simply place them in an airtight container, and keep them in the refrigerator. They should last about a week. Just make sure to separate layers with parchment paper to prevent sticking—nobody wants a melted chocolate mess!
Can I make these truffles ahead of time?
Absolutely! Making mummy truffles ahead of schedule can save you time and stress. You can prepare them a day or two in advance, store them in the refrigerator, and they’ll still taste wonderful. Just be sure to wait until the day of your event to add any decorations, like the chocolate drizzle that creates the mummy effect, to keep them looking fresh and festive.
What if I don’t have white chocolate?
No white chocolate? No problem! You can substitute it with a variety of other coatings. Milk chocolate or even dark chocolate can make a great alternative, though they will provide a different flavor profile. If you’re feeling adventurous, consider using yogurt coating or candy melts for an extra pop of color and sweetness. The choice is yours—creativity is key when crafting your mummy truffles!
For extra tips and tricks on chocolate substitutions, you might check out sources like Serious Eats and Food Network. Feel free to make these treats your own!
Conclusion on Mummy Truffles
Recap of the spooky fun and cravings satisfaction
Creating Mummy Truffles is not only about satisfying sweet cravings but also about embracing the festive spirit that Halloween brings. These adorable treats are a delightful way to add a touch of creativity to your gatherings. Imagine indulging in a rich, chocolatey bite that screams festive fun while being a conversation starter at your next party!
So, the next time you’re pondering what to whip up for Halloween, consider giving these cute confections a try. They’re quick, easy, and will have your friends talking! For more festive ideas, check out resources like Taste of Home or Epicurious. After all, who doesn’t love a sweet treat with a twist?
Mummy Truffles: Easy Indulgence for Halloween Treats at Home
Mummy Truffles are a delightful and easy Halloween treat that you can make at home, perfect for parties and festive gatherings.
- Prep Time: 30 minutes
- Cook Time: 15 minutes
- Total Time: 45 minutes
- Yield: 12 truffles 1x
- Category: Dessert
- Method: No Bake
- Cuisine: American
- Diet: Vegetarian
Ingredients
- 1 cup chocolate chips
- 1/2 cup cream cheese
- 1 cup crushed cookies
- 1 cup white chocolate for coating
- eyes (candy eyeballs)
Instructions
- In a bowl, mix the cream cheese and crushed cookies until well combined.
- Chill the mixture for 30 minutes.
- Once chilled, form the mixture into small balls.
- Melt the chocolate chips and dip the truffles in the melted chocolate.
- Allow to set, then drizzle with melted white chocolate to create ‘bandages’.
- Add candy eyeballs for the finishing touch.
Notes
- Store in an airtight container for up to a week.
- Experiment with different chocolate types for unique flavors.
Nutrition
- Serving Size: 1 truffle
- Calories: 150
- Sugar: 10g
- Sodium: 50mg
- Fat: 8g
- Saturated Fat: 4g
- Unsaturated Fat: 2g
- Trans Fat: 0g
- Carbohydrates: 15g
- Fiber: 1g
- Protein: 2g
- Cholesterol: 10mg
Keywords: Mummy Truffles, Halloween Treats, Easy Recipes