Introduction to Crispy Chicken Katsu
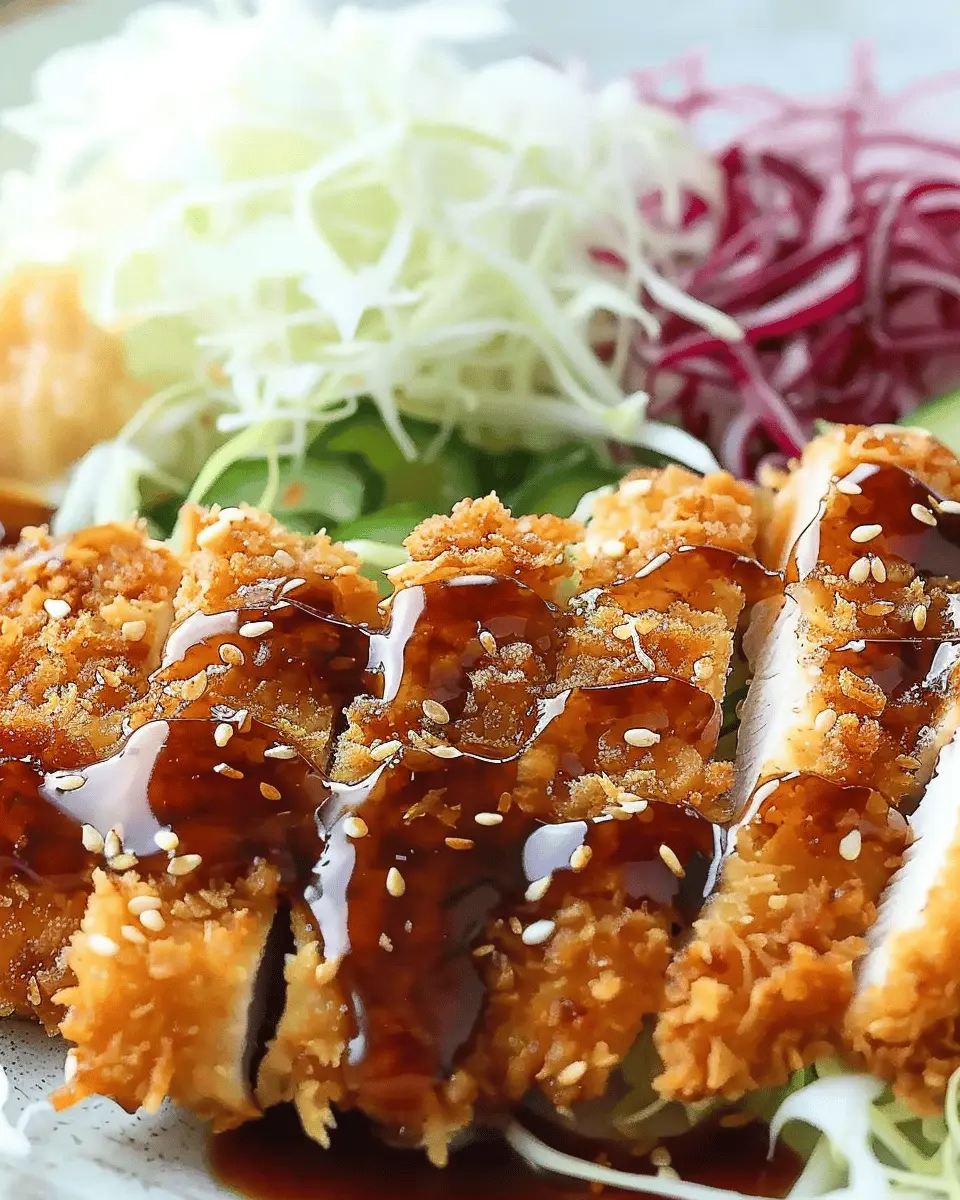
Crispy Chicken Katsu has quickly become a favorite for those who appreciate the simple yet indulgent flavors of Japanese cuisine. But what is it about this dish that captures the hearts of so many? It might be the perfect juxtaposition of crispiness and tenderness or the satisfying crunch that greets your senses with every bite. Whether served with rice or on a bed of salad, this dish offers both comfort and sophistication, making it a culinary go-to for the modern home cook.
Why is Chicken Katsu so beloved?
One key reason for the popularity of crispy chicken katsu is its versatility. It can be enjoyed in various ways, whether as a standalone dish, in a sandwich, or even as part of a bento box. It’s accessible to make and features ingredients that many of us already have in our kitchens, such as chicken breasts, breadcrumbs, and simple seasonings.
But let’s dig a little deeper. Did you know that chicken, as a protein, is among the most consumed meats globally? According to the Food and Agriculture Organization (FAO), chicken consumption has increased steadily due to its health benefits and adaptability in various cuisines. Crispy chicken katsu capitalizes on this versatility by allowing you to customize flavors with tonkatsu sauce or a squeeze of lemon, enhancing the experience.
Moreover, the technique of breading and frying chicken delivers that addictive crunch that we can all appreciate. The Japanese breading method, known as panko, creates a lighter, airier coating compared to traditional breadcrumbs, resulting in a texture that’s just out of this world. If you’re curious about exploring more about this unique breadcrumb type, check out references from credible culinary guides.
The appeal of homemade katsu
Making crispy chicken katsu at home not only elevates your meals but also gives you the joy of cooking. Imagine the satisfaction of frying up your own batch, perfectly golden and crispy, as your kitchen fills with mouth-watering aromas. It’s the kind of dish that encourages creativity—experimenting with spices or sauces can lead to delightful new versions. Why not create a spicy version with some chili flakes or pair it with a savory curry sauce?
In a nutshell, the crispy chicken katsu isn’t just a meal; it’s an experience that brings comfort, joy, and a touch of culinary adventure to your dining table. Whether you are cooking for yourself or impressing a few friends, this dish is sure to be a hit!
Ingredients for Crispy Chicken Katsu
Essential ingredients for the perfect katsu
To whip up an irresistibly crispy chicken katsu, you’ll need uncomplicated yet essential ingredients that bring out the best in your dish:
- Chicken breast: Opt for boneless, skinless chicken breasts for convenience and tenderness.
- Panko breadcrumbs: These Japanese-style breadcrumbs provide that signature crunch you crave.
- Egg: A simple egg wash helps the panko adhere well to the chicken.
- Flour: All-purpose flour creates a nice base for the breading.
- Salt and pepper: Basic seasonings that elevate the chicken’s flavor profile.
- Oil: A high smoke point oil, like vegetable or canola, is ideal for frying to achieve that golden brown.
Want to learn more about the role of breadcrumbs? Check out Serious Eats for expert insights.
Recommended substitutes for dietary needs
If you’re looking to tweak this recipe for specific dietary needs, here are some great alternatives:
- Gluten-free: Use almond flour and gluten-free panko for a celiac-friendly version.
- Low-carb: Try crushed pork rinds or a mix of ground almonds and parmesan instead of panko.
- Plant-based: For a vegetarian option, you can swap chicken with eggplant or tofu, adjusting cooking times as needed.
By embracing these substitutes, you can still enjoy that crispy chicken katsu experience, no matter your dietary restrictions!
Preparing Crispy Chicken Katsu
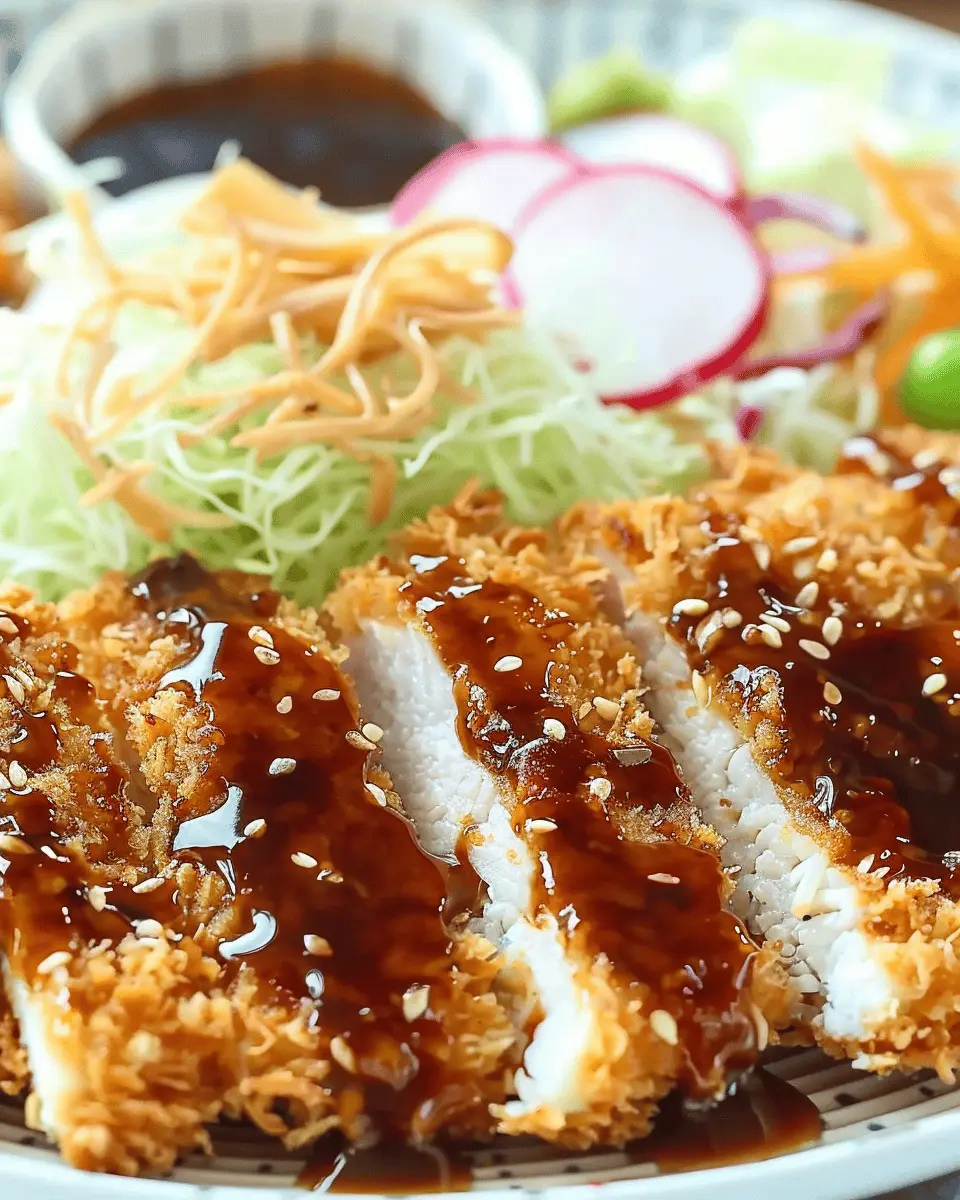
When it comes to comforting yet delicious dishes, few can rival the beloved crispy chicken katsu. This popular Japanese dish features tender chicken coated in a crunchy, golden breading, often served with rice and a tangy sauce. Here’s how to prepare it effortlessly in your kitchen.
Gather and prep your ingredients
To get started, it’s essential to have everything lined up for success. Here’s a simple checklist of what you’ll need:
- Boneless, skinless chicken breasts (about 1 pound)
- Salt and pepper
- All-purpose flour (1 cup)
- Eggs (2, beaten)
- Panko breadcrumbs (1 cup) – these are crucial for that extra crunch
- Vegetable oil (for frying)
- Tonkatsu sauce (for serving)
Before you dive in, take a moment to ensure your kitchen is tidy and you have the right tools at hand. Having a meat mallet or rolling pin handy for tenderizing your chicken will make the process smoother. For a detailed overview of cooking chicken, you might want to check out the USDA’s guidelines on poultry handling.
Tenderize the chicken properly
Tenderizing the chicken is vital for achieving that melt-in-your-mouth texture. Start by placing each chicken breast between two sheets of plastic wrap. This not only keeps your workspace clean but also prevents splattering!
Using your meat mallet or rolling pin, gently pound the chicken to an even thickness of about half an inch. This ensures that your chicken cooks uniformly, preventing any dry, chewy pieces. Remember, an evenly cooked chicken katsu not only looks great but tastes fantastic, too.
Prepare the breading stations
Now that your chicken is tenderized, it’s time to set up your breading stations. This process is key to creating perfectly crispy chicken katsu. On one plate, put your all-purpose flour mixed with a little salt and pepper. On another plate, pour out your beaten eggs. Finally, spread your panko breadcrumbs on a third plate.
This arrangement might seem basic, but it’s essential. Having separate stations allows for a quick and easy coating process, helping to minimize mess and ensuring that each piece of chicken is perfectly covered.
Coat the chicken for optimal crispiness
Now comes the fun part! Start by taking a piece of your tenderized chicken and dredging it in the flour. Make sure to coat it evenly, shaking off any excess. Next, dip it into the beaten eggs, allowing any extra egg to drip off. Conclude by pressing it into the panko breadcrumbs. Ensure every inch is covered as these breadcrumbs will give your crispy chicken katsu that irresistible crunch!
For the best results, consider letting the coated chicken rest on a wire rack for about 10 minutes. This allows the coating to adhere better during frying, ensuring a crispy exterior that won’t fall off.
Fry to golden perfection
For that crispy chicken katsu experience, frying is the way to go. In a large skillet, heat about half an inch of vegetable oil over medium heat. To test if the oil is hot enough, drop in a few breadcrumbs—if they sizzle, you’re ready to fry!
Carefully add the coated chicken to the pan, being sure not to overcrowd it; this helps maintain the oil’s temperature. Fry for about 4-5 minutes on each side, or until golden brown and cooked through. Use a meat thermometer if you’re unsure; the internal temperature should reach 165°F.
Once done, transfer your chicken katsu to a paper towel-lined plate to soak up any excess oil. Serve it with a drizzle of tonkatsu sauce for that authentic touch.
Enjoy your homemade crispy chicken katsu, and don’t be surprised if your friends start asking for dinner invitations more often!
Variations on Crispy Chicken Katsu
When it comes to crispy chicken katsu, the options for delicious variations are nearly limitless! Whether you’re looking to spice things up or explore alternative proteins, there’s a twist for everyone. Let’s dive in!
Spicy Katsu with Chili Flakes
If you enjoy adding a kick to your meals, trying a spicy crispy chicken katsu is a must! Simply mix in chili flakes or a dash of cayenne pepper into your panko breadcrumbs for an added layer of heat. Don’t stop there—serve with a homemade spicy mayo by blending mayonnaise with sriracha. This tangy condiment not only enhances the flavor but creates a delightful creaminess that pairs perfectly with the crunch of the katsu.
Tips for the perfect spicy katsu:
- Adjust the chili intensity to your preferences.
- Serve with a side of pickled vegetables to balance the spice.
For more ideas about spicy foods, check out this article from Spiceography.
Katsu with Alternative Proteins
Feeling adventurous? Try using tofu or even seitan for a plant-based twist on the classic crispy chicken katsu. Simply press and slice your tofu into cutlets, marinate it, and then follow the traditional breading and frying process. The crispy exterior combined with the tender inside creates a surprisingly satisfying meal for both vegetarians and meat-eaters alike!
Quick steps to prepare alternative protein katsu:
- Use firm tofu for the best texture.
- Experiment with various marinades—soy sauce and ginger work wonders.
For additional guidance on cooking plant-based proteins, Forks Over Knives offers excellent resources that could inspire your dish further!
So there you have it! With a bit of creativity, your crispy chicken katsu can take on new flavors, appealing to a wider range of palates.
Cooking Tips and Notes for Crispy Chicken Katsu
Importance of Temperature Control
Getting the temperature just right is crucial for that crispy chicken katsu perfection. When frying, aim for oil between 350°F to 375°F. If it’s too low, your chicken will absorb excess oil, resulting in a soggy texture. Too high, and your breading might burn before the chicken cooks through. A kitchen thermometer can be a game changer here—this simple tool can help you achieve that ideal crispy crunch!
Best Oils for Frying
Not all oils are created equal when it comes to frying. For crispy chicken katsu, choose oils with a high smoke point such as vegetable oil, canola oil, or peanut oil. These oils not only withstand higher temperatures but also enhance the overall flavor of your dish. You want that golden crust without a burnt taste, right? For a light, delicate finish, avoid olive oil, as it can overpower the chicken’s subtle flavor.
For more tips on oil selection, consider checking out this guide from Serious Eats to broaden your frying horizons.
Happy cooking!
Serving Suggestions for Crispy Chicken Katsu
Accompaniments that Enhance the Meal
When savoring crispy chicken katsu, the right accompaniments can elevate your meal to new heights. Consider pairing it with:
- Steamed Rice: A classic choice, fluffy white or brown rice serves as the perfect base to soak up any delicious sauce.
- Miso Soup: This warm, savory soup not only complements the katsu but also adds a comforting touch to your meal.
- Pickled Vegetables: A tangy side of pickled daikon or cucumbers can balance the richness of the breaded chicken.
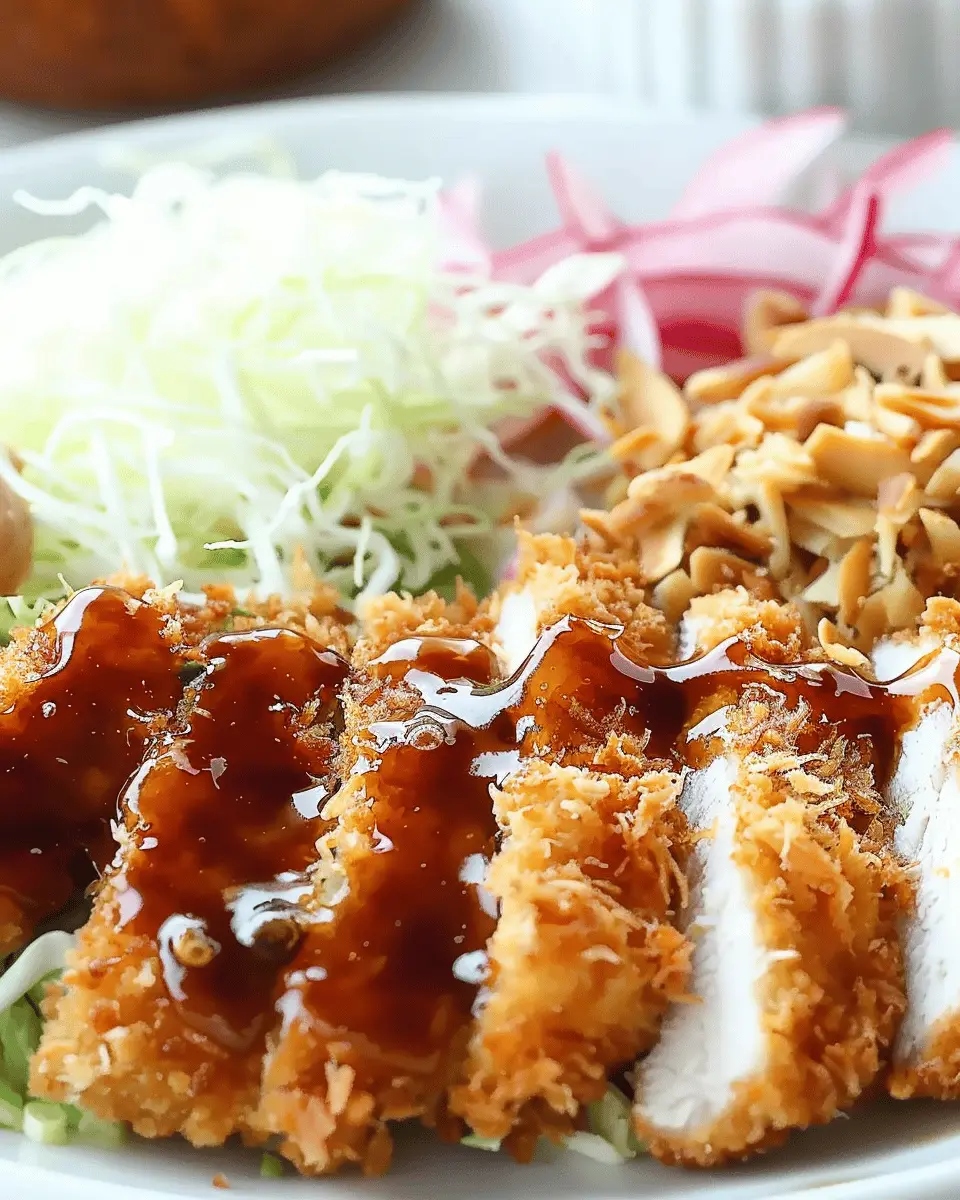
- Shredded Cabbage Salad: Something fresh and crunchy, dressed lightly in sesame oil, adds delightful texture and flavor contrasts.
These elements not only enhance the taste of your crispy chicken katsu, but also provide a colorful plate that’s visually appealing.
Creative Plating Ideas
Plating is key to creating an appetizing experience. Here are some fun ideas:
- Layered Presentation: Stack the katsu slices atop a mound of rice, drizzling tonkatsu sauce over it for a mouthwatering effect.
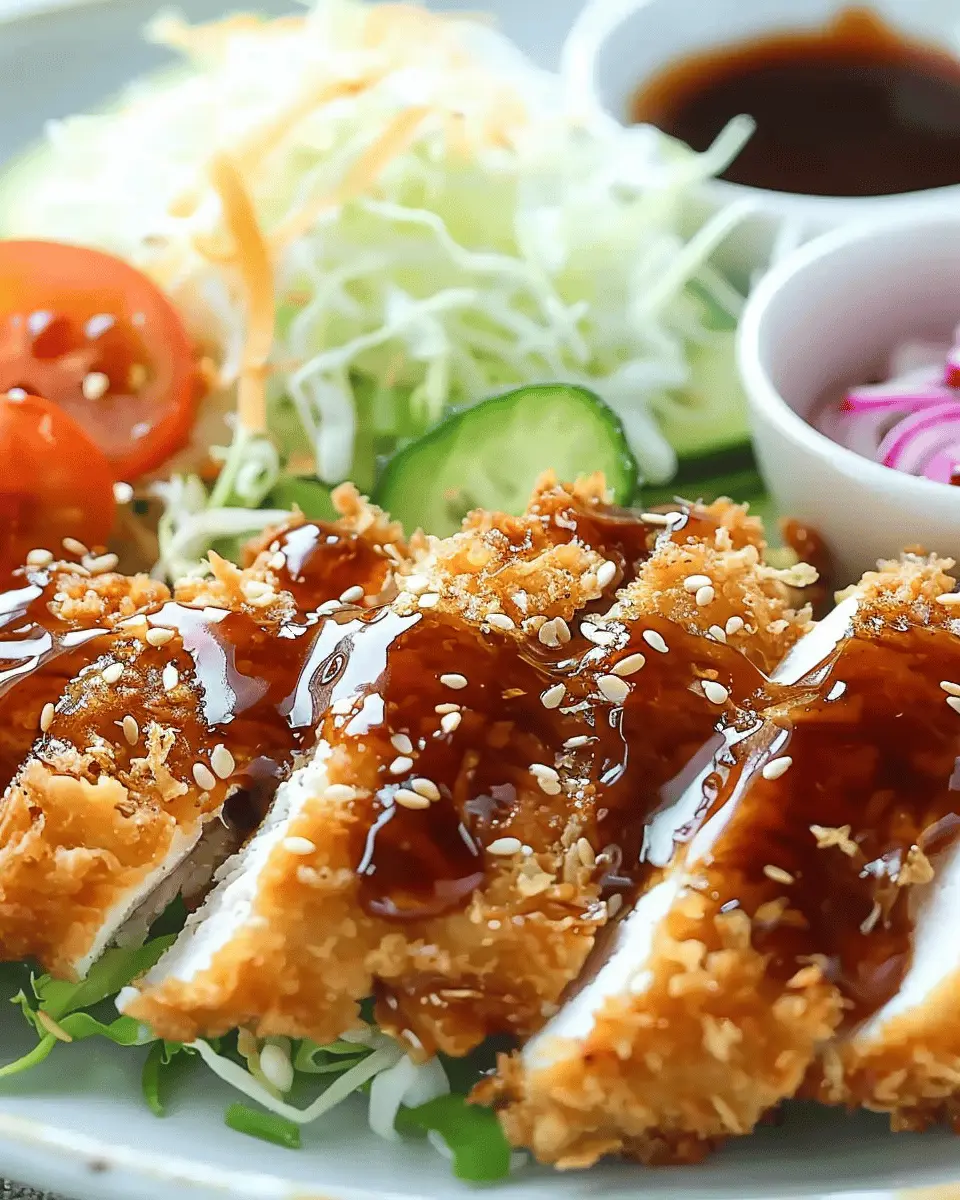
- Bowl Style: Place your katsu alongside a vibrant salad in a bowl for a modern, casual touch.
- Garnish Thoughtfully: Garnish with sesame seeds and fresh herbs for that restaurant-quality finish.
For more inspiration on creative plating techniques, check out this guide on food presentation. Remember, a beautifully plated dish can make your homemade crispy chicken katsu feel like a gourmet meal!
Time Breakdown for Crispy Chicken Katsu
Preparation time
Getting started on your crispy chicken katsu doesn’t take long! You’ll need about 15 minutes to gather your ingredients, pound the chicken, and prepare your breading station. It’s a straightforward process, and you’ll soon be on your way to crispy perfection.
Cooking time
Once everything is prepped, cooking these chicken cutlets will take approximately 10-15 minutes. The actual frying isn’t lengthy, but you’ll want to ensure each piece achieves that golden-brown color, a hallmark of katsu.
Total time
All in all, you’re looking at around 30 minutes from start to finish. That’s not bad for a meal that delivers so much deliciousness! If you’re short on time, meal prepping can be a great option: bread a batch in advance and fry them fresh as needed.
Looking for more cooking tips? Check out Serious Eats for expert advice on achieving the ultimate crunch.
Nutritional Facts for Crispy Chicken Katsu
Calories per serving
A typical serving of crispy chicken katsu packs around 400 calories, which makes it a great choice for a satisfying meal without going overboard. Given its delicious crunchy exterior and flavorful coating, it’s easy to see why this dish is a favorite!
Macronutrient breakdown
When we break it down, each serving consists of:
- Protein: Approximately 24g, essential for muscle repair and growth.
- Fat: Roughly 22g, mainly from the frying process; opting for healthier oils can help here.
- Carbohydrates: Around 30g, mostly from the breadcrumbs, providing energy.
Recommended portion sizes
For young professionals looking to maintain a balanced diet, aim for a portion size of about 4-6 ounces of chicken. Pair it with a side of veggies or a salad to add fiber and nutrients, keeping the meal well-rounded. If you’re curious about portioning tips, the Academy of Nutrition and Dietetics offers excellent guidelines on serving sizes.
Ultimately, savoring your crispy chicken katsu mindfully allows you to enjoy it while supporting your health goals!
FAQs about Crispy Chicken Katsu
Can I bake chicken katsu instead of frying?
Absolutely! While traditional crispy chicken katsu is often fried to achieve that golden, crunchy exterior, baking is a healthier alternative. To bake your chicken katsu, preheat your oven to 425°F (220°C). Place the breaded chicken on a lined baking sheet, spray lightly with oil for extra crispiness, and bake for about 20-25 minutes or until cooked through, flipping halfway. You’ll still get a deliciously crispy result—just with less oil!
What dipping sauces pair well with chicken katsu?
When it comes to dipping sauces, versatility is key! Besides the classic tonkatsu sauce, you might enjoy:
- Soy sauce: Simple and savory.
- Sweet chili sauce: A fabulous sweet and spicy kick.
- Wasabi mayo: A creamy, zesty option for a bit of heat.
- Ketchup with a twist: Add a dash of soy sauce to your ketchup for a unique flavor boost.
These options complement the crispy chicken katsu perfectly, adding extra layers of flavor to each bite.
How do I store leftovers?
Storing your leftover crispy chicken katsu is simple! Place it in an airtight container in the refrigerator, and it should last for up to three days. For longer storage, consider freezing it. Just let the chicken cool completely, then wrap it tightly in foil or plastic wrap, or place it in a freezer bag. When you’re ready to enjoy it again, reheat in the oven at 375°F (190°C) to restore its crunch.
If you want to learn more about storing and reheating methods, check out guides on reputable culinary websites like Serious Eats for expert insights!
With these FAQs in mind, you can enjoy your crispy chicken katsu without a hitch! Happy cooking!
Conclusion on Crispy Chicken Katsu
Why You Should Try Making Katsu at Home
Making crispy chicken katsu at home is an experience that brings a delightful crunch and savory satisfaction to your kitchen. Here’s why you should give it a shot:
- Customization Options: You can adjust seasonings and spices to cater to your taste preferences, whether you like it spicy or mild.
- Healthier Choices: With homemade katsu, you control the ingredients, allowing you to opt for leaner proteins or gluten-free breadcrumbs.
- Fun Cooking Activity: Preparing katsu can be a fun and engaging activity, perfect for cooking with friends or impressing that special someone.
So why not dive into this culinary adventure? You’ll not only enjoy the crispy chicken katsu delight but also gain valuable cooking skills along the way! For a deeper dive into the culinary world, check out resources from Serious Eats and The Kitchn. Happy cooking!
Crispy Chicken Katsu: Easy Recipe for a Crunchy Delight at Home
Learn how to make a deliciously crunchy chicken katsu at home with this easy recipe.
- Prep Time: 15 minutes
- Cook Time: 10 minutes
- Total Time: 25 minutes
- Yield: 2 servings 1x
- Category: Main Course
- Method: Frying
- Cuisine: Japanese
- Diet: Gluten-Free
Ingredients
- 2 chicken breasts
- 1 cup all-purpose flour
- 2 large eggs
- 2 cups panko breadcrumbs
- 1 teaspoon salt
- 1/2 teaspoon pepper
- 1 cup vegetable oil
Instructions
- Start by flattening the chicken breasts with a meat mallet until they are about 1/2 inch thick.
- Set up a breading station with three bowls: one for flour, one for beaten eggs, and one for panko breadcrumbs.
- Season the flour with salt and pepper, then dredge each chicken breast in the flour, dip into the eggs, and finally coat with panko breadcrumbs.
- Heat the vegetable oil in a large skillet over medium-high heat until hot.
- Fry each breast for about 4-5 minutes on each side, or until golden brown and cooked through.
- Remove from skillet and place on a paper towel-lined plate to drain excess oil.
- Slice and serve with your favorite sauce.
Notes
- For extra crunch, you can double coat the chicken.
- Serve with tonkatsu sauce for added flavor.
Nutrition
- Serving Size: 1 chicken breast
- Calories: 450
- Sugar: 0
- Sodium: 600
- Fat: 25
- Saturated Fat: 5
- Unsaturated Fat: 15
- Trans Fat: 0
- Carbohydrates: 35
- Fiber: 2
- Protein: 30
- Cholesterol: 100
Keywords: Crispy Chicken Katsu